
Startup and Data Restore
The app restores saved libraries, media folders, and cache state at launch. Library analysis and generated-file cleanup are available without signing in or subscribing.
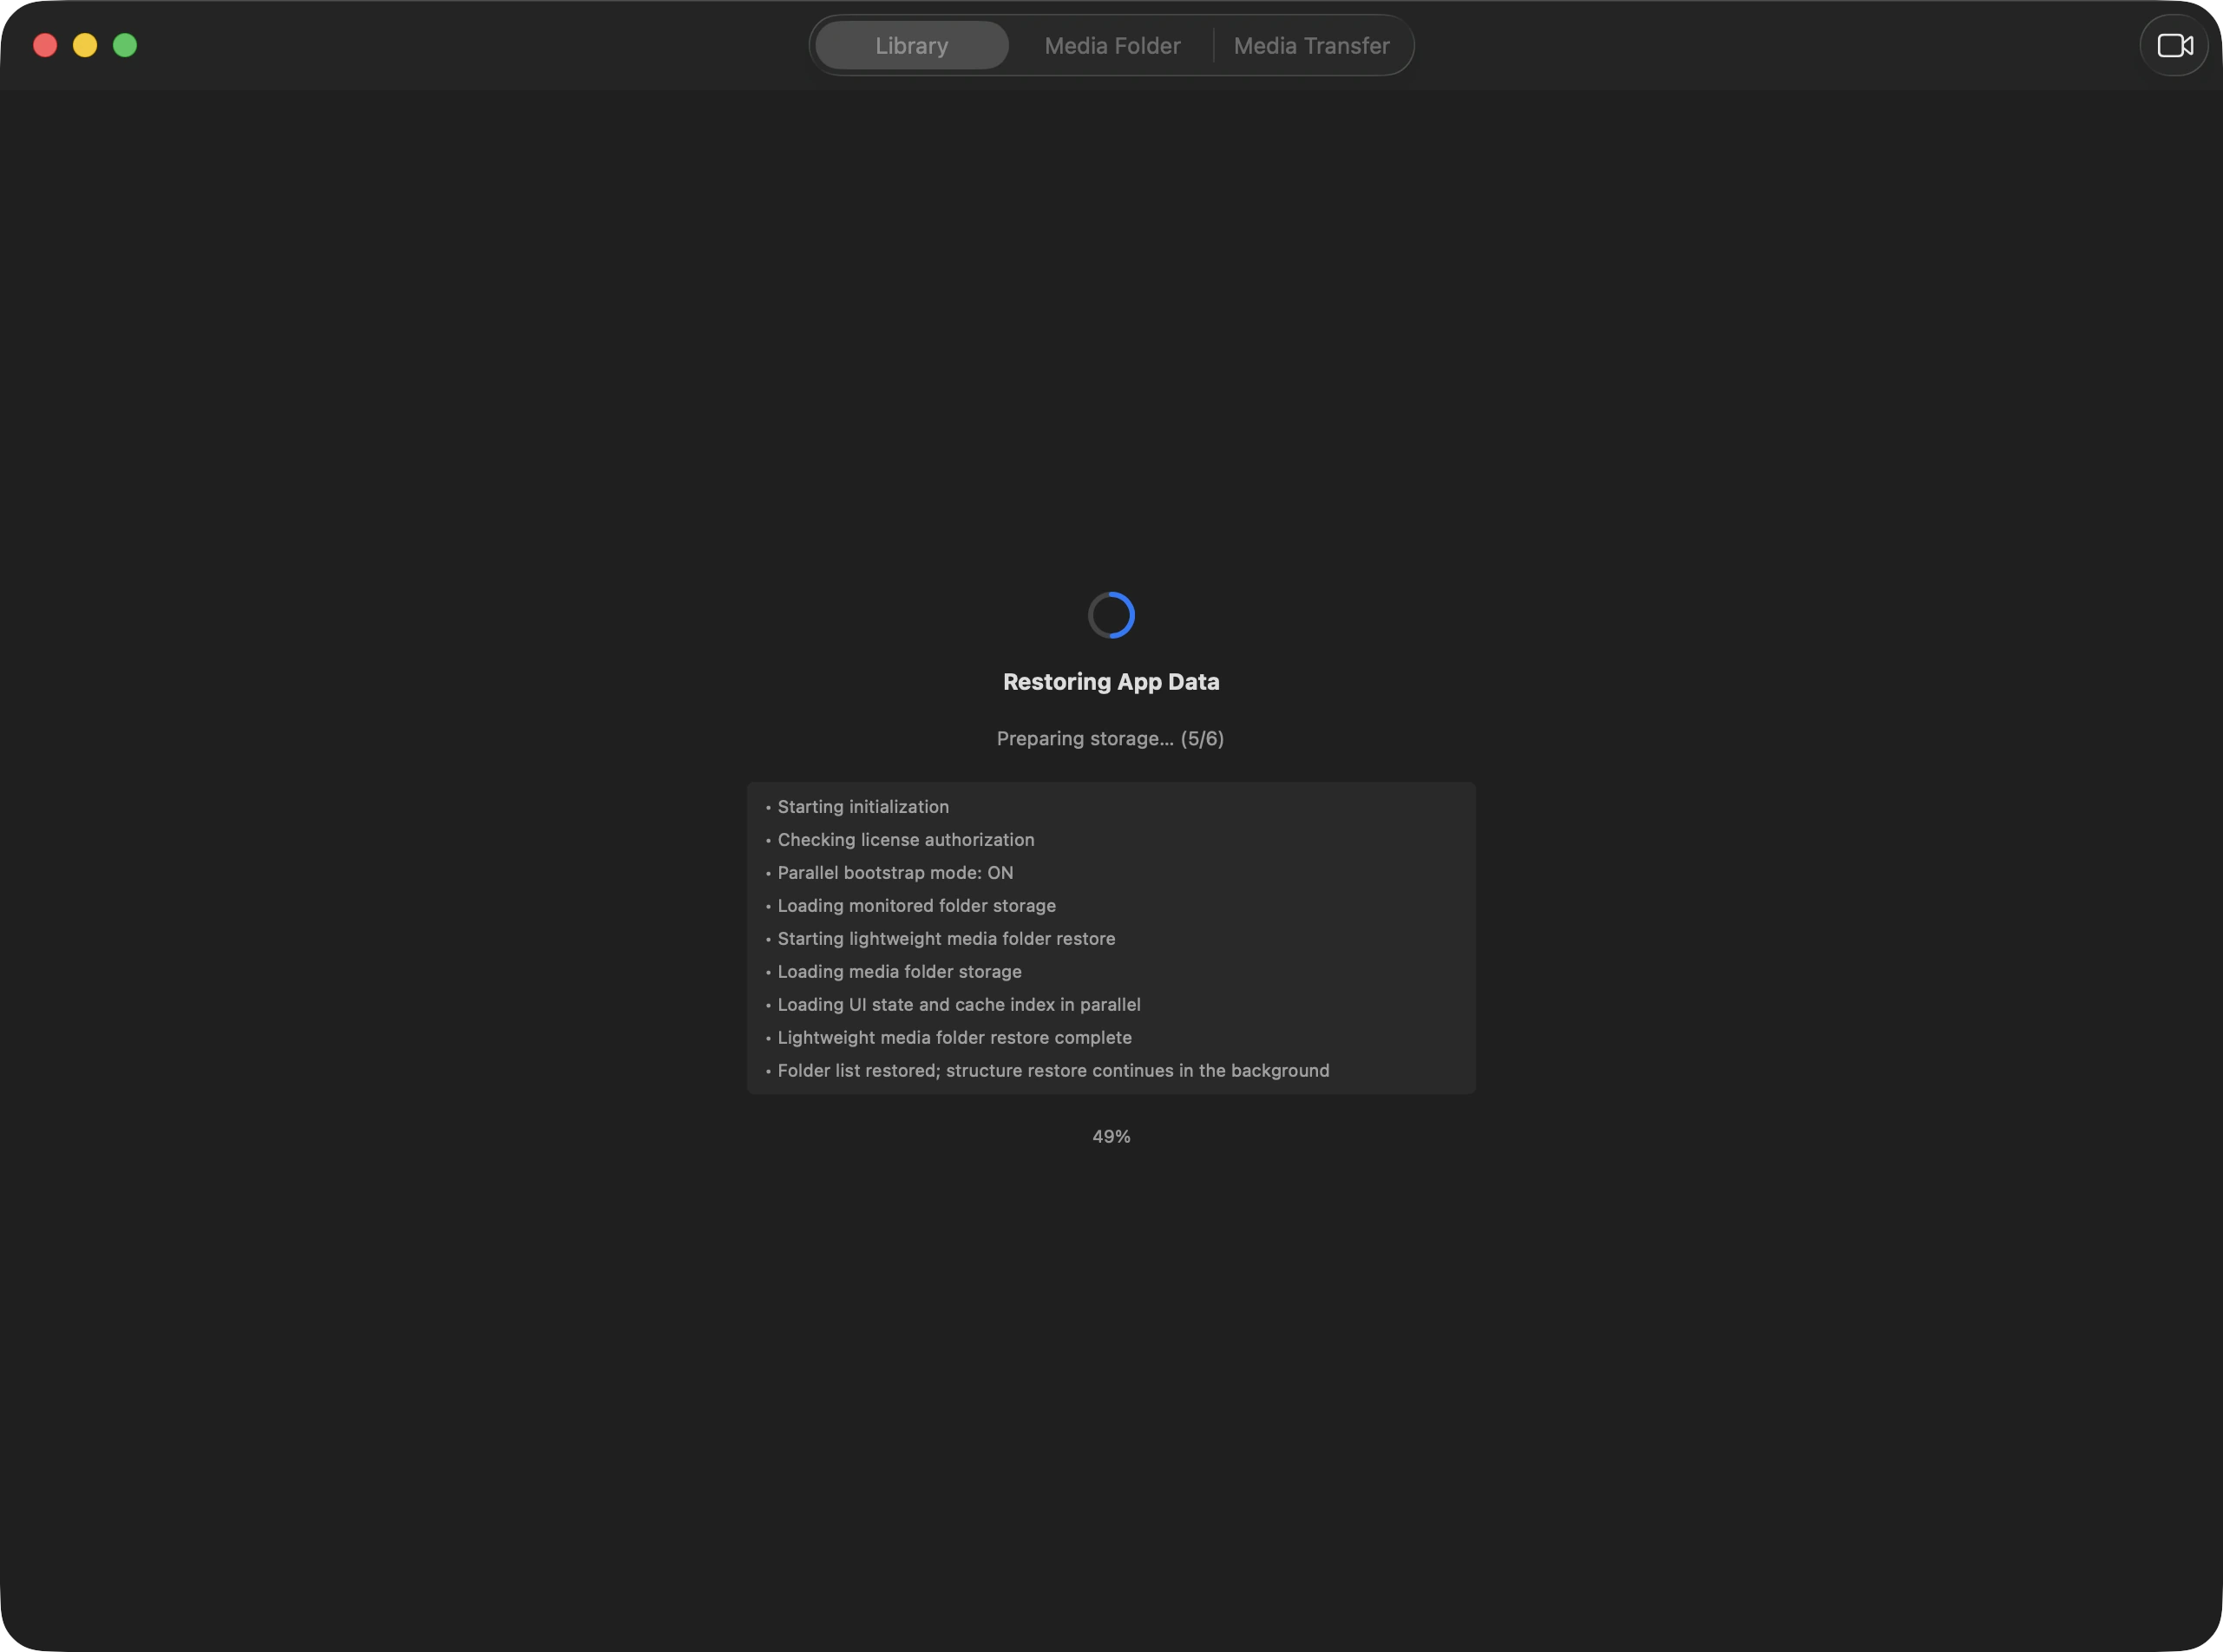
Step 1 / 3
Launch the app to load saved Library entries and analysis records for media folders.
How to use it
What this feature does
- Library analysis and generated-file cleanup are free, with no sign-in or subscription required.
- During restore, the user sees progress, status text, and detail lines.
- Deleting original or external media, transferring media, repairing links, and changing links require Pro access.
When to use it
When multiple libraries and large media folders are registered, the app restores the saved work state first after restart instead of immediately reanalyzing. Continue reviewing from the previous work state after restore completes.
Operational notes
- If startup takes a moment, the app may be restoring previous work state.
- Large libraries or many network folders can make restore take longer.
- If restore repeatedly fails, check connected external volumes and storage permissions first.
Inspect a Library in Library Analysis
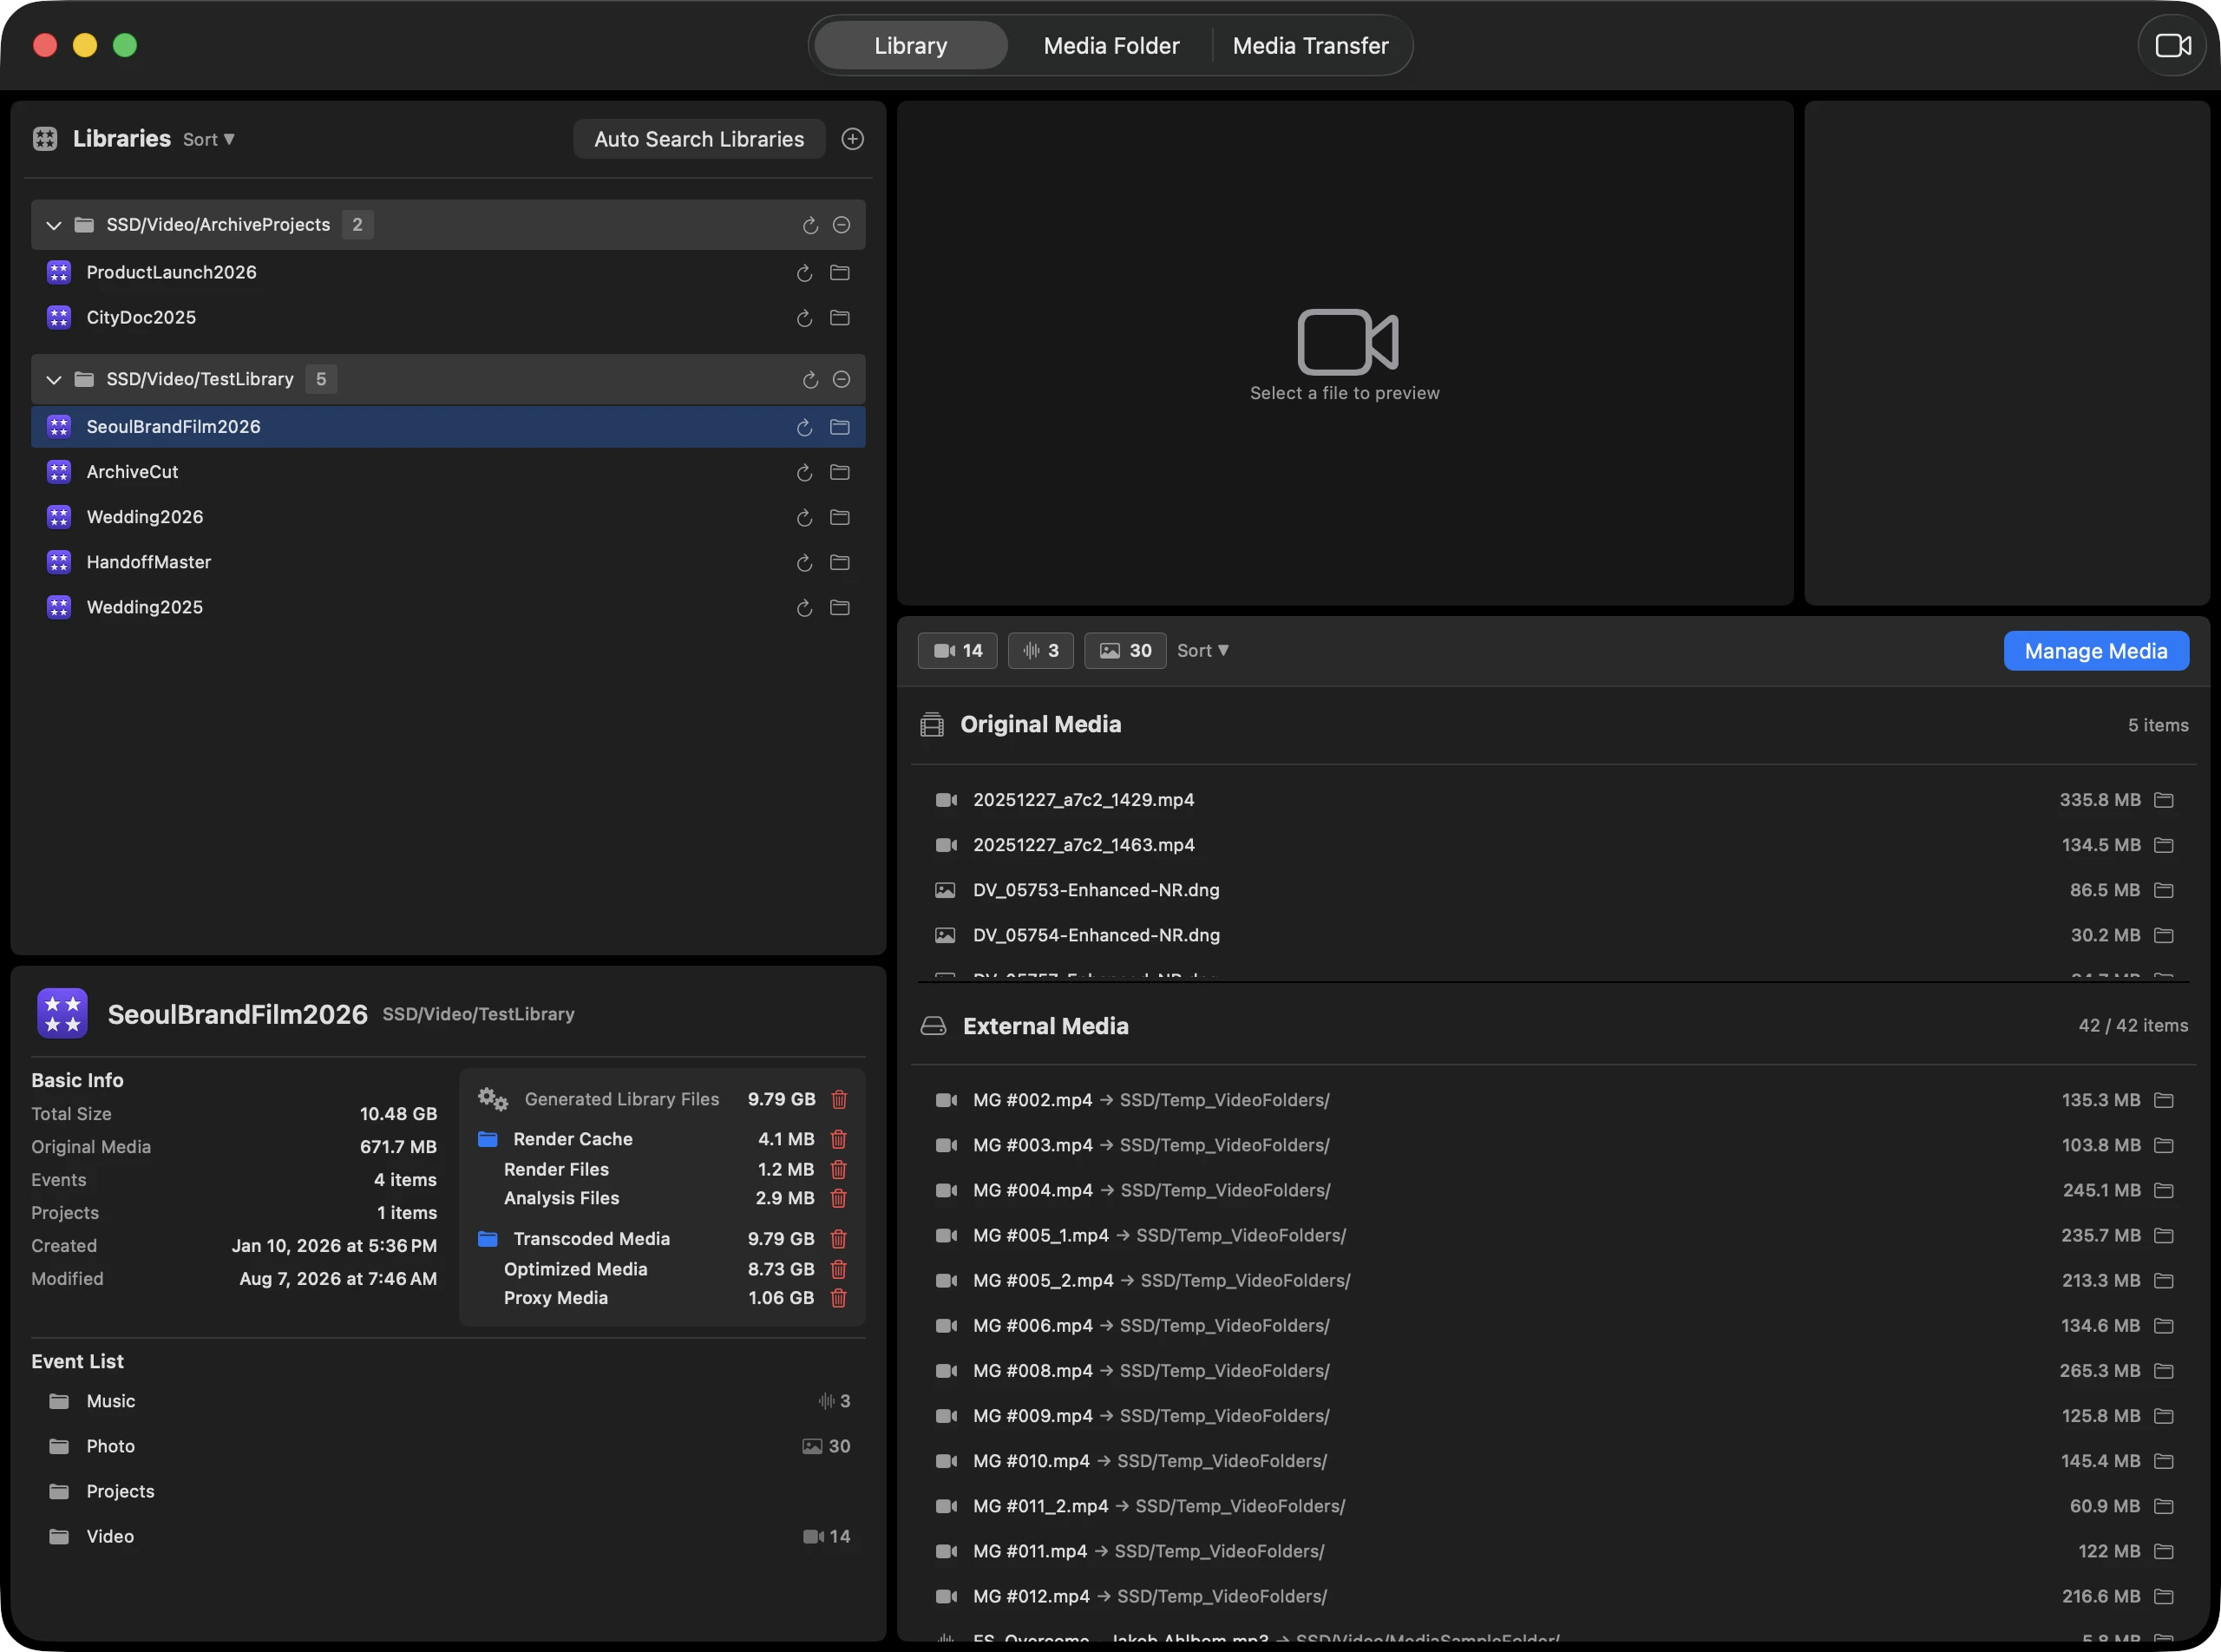
The Library menu lets you open an FCP library and view total size, Original Media, events, projects, render cache, and External Media (symbolic links) at a glance.
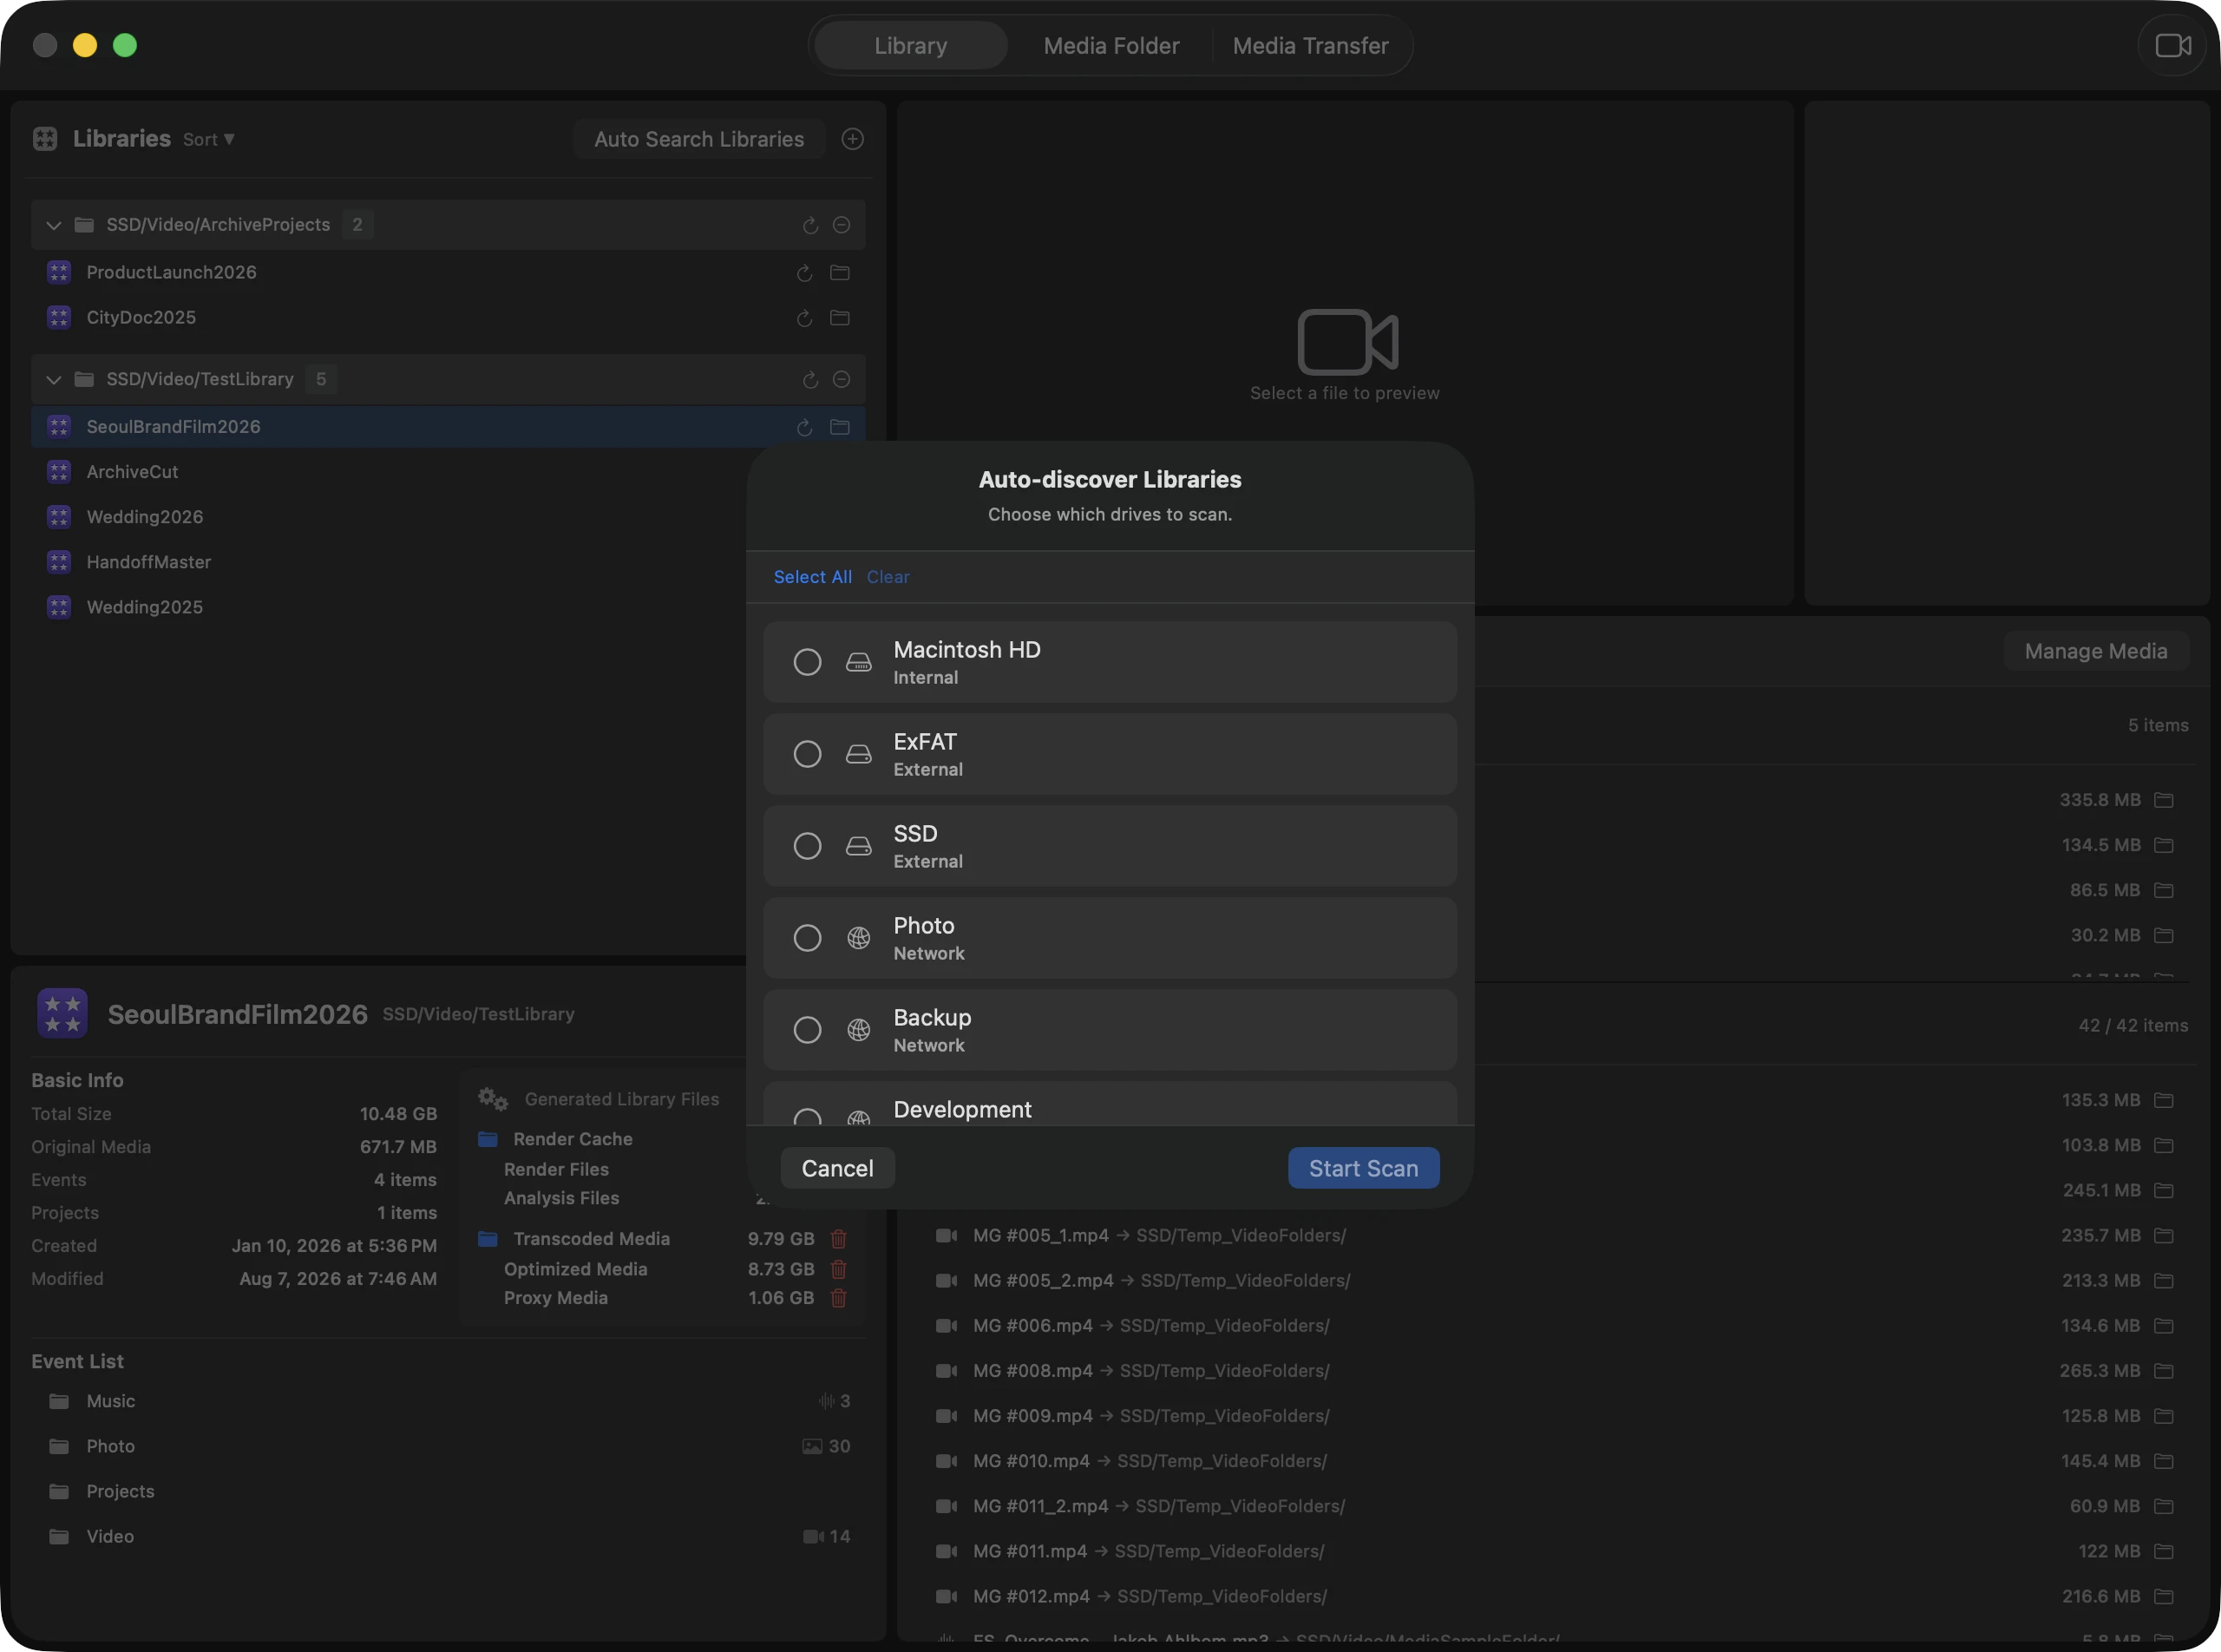
Step 1 / 5
Use the upper-left plus button to add an FCP library directly, or open Auto Library Search, select the volumes to scan, and start the search; then select the library from its full-path folder group.
How to use it
What this feature does
- Auto Library Search scans the volumes you choose for FCP libraries, shows progress by volume, and can be cancelled before it finishes.
- Libraries are grouped by parent folder, whose header shows the full path so identically named libraries remain distinguishable. The sort menu also supports sorting by size.
- Each library row can be refreshed, revealed in Finder, removed from Footage Manager, or opened in Final Cut Pro with a double-click.
- The media toolbar filters by video, audio, or image and sorts the shared Original Media and External Media lists.
- External Media separates valid links, files on an unmounted volume, and links whose target is genuinely missing.
- Selecting a file synchronizes the preview and Media Info; supported media can also be inspected in the full-screen viewer.
When to use it
When receiving a project, open it in Library Analysis first, check the ratio of Original Media to External Media, and move to Auto Relink if broken links appear.
Operational notes
- Use this tab before cleanup, relinking, or transfer work so later actions start from a current library analysis.
- Refresh a library after major FCP edits or storage changes; the row reports preparation, library analysis, media analysis, and result-saving progress.
- An unmounted-volume warning is not the same as a deleted file. Mount the drive before deciding that a link is broken.
- The media toolbar is temporarily disabled during reanalysis so stale results cannot be acted on.
Reading the Library Info Panel
The Library Info panel is the quick operational summary for deciding what to inspect next. Library analysis and generated-file cleanup are free, with no sign-in or subscription required.
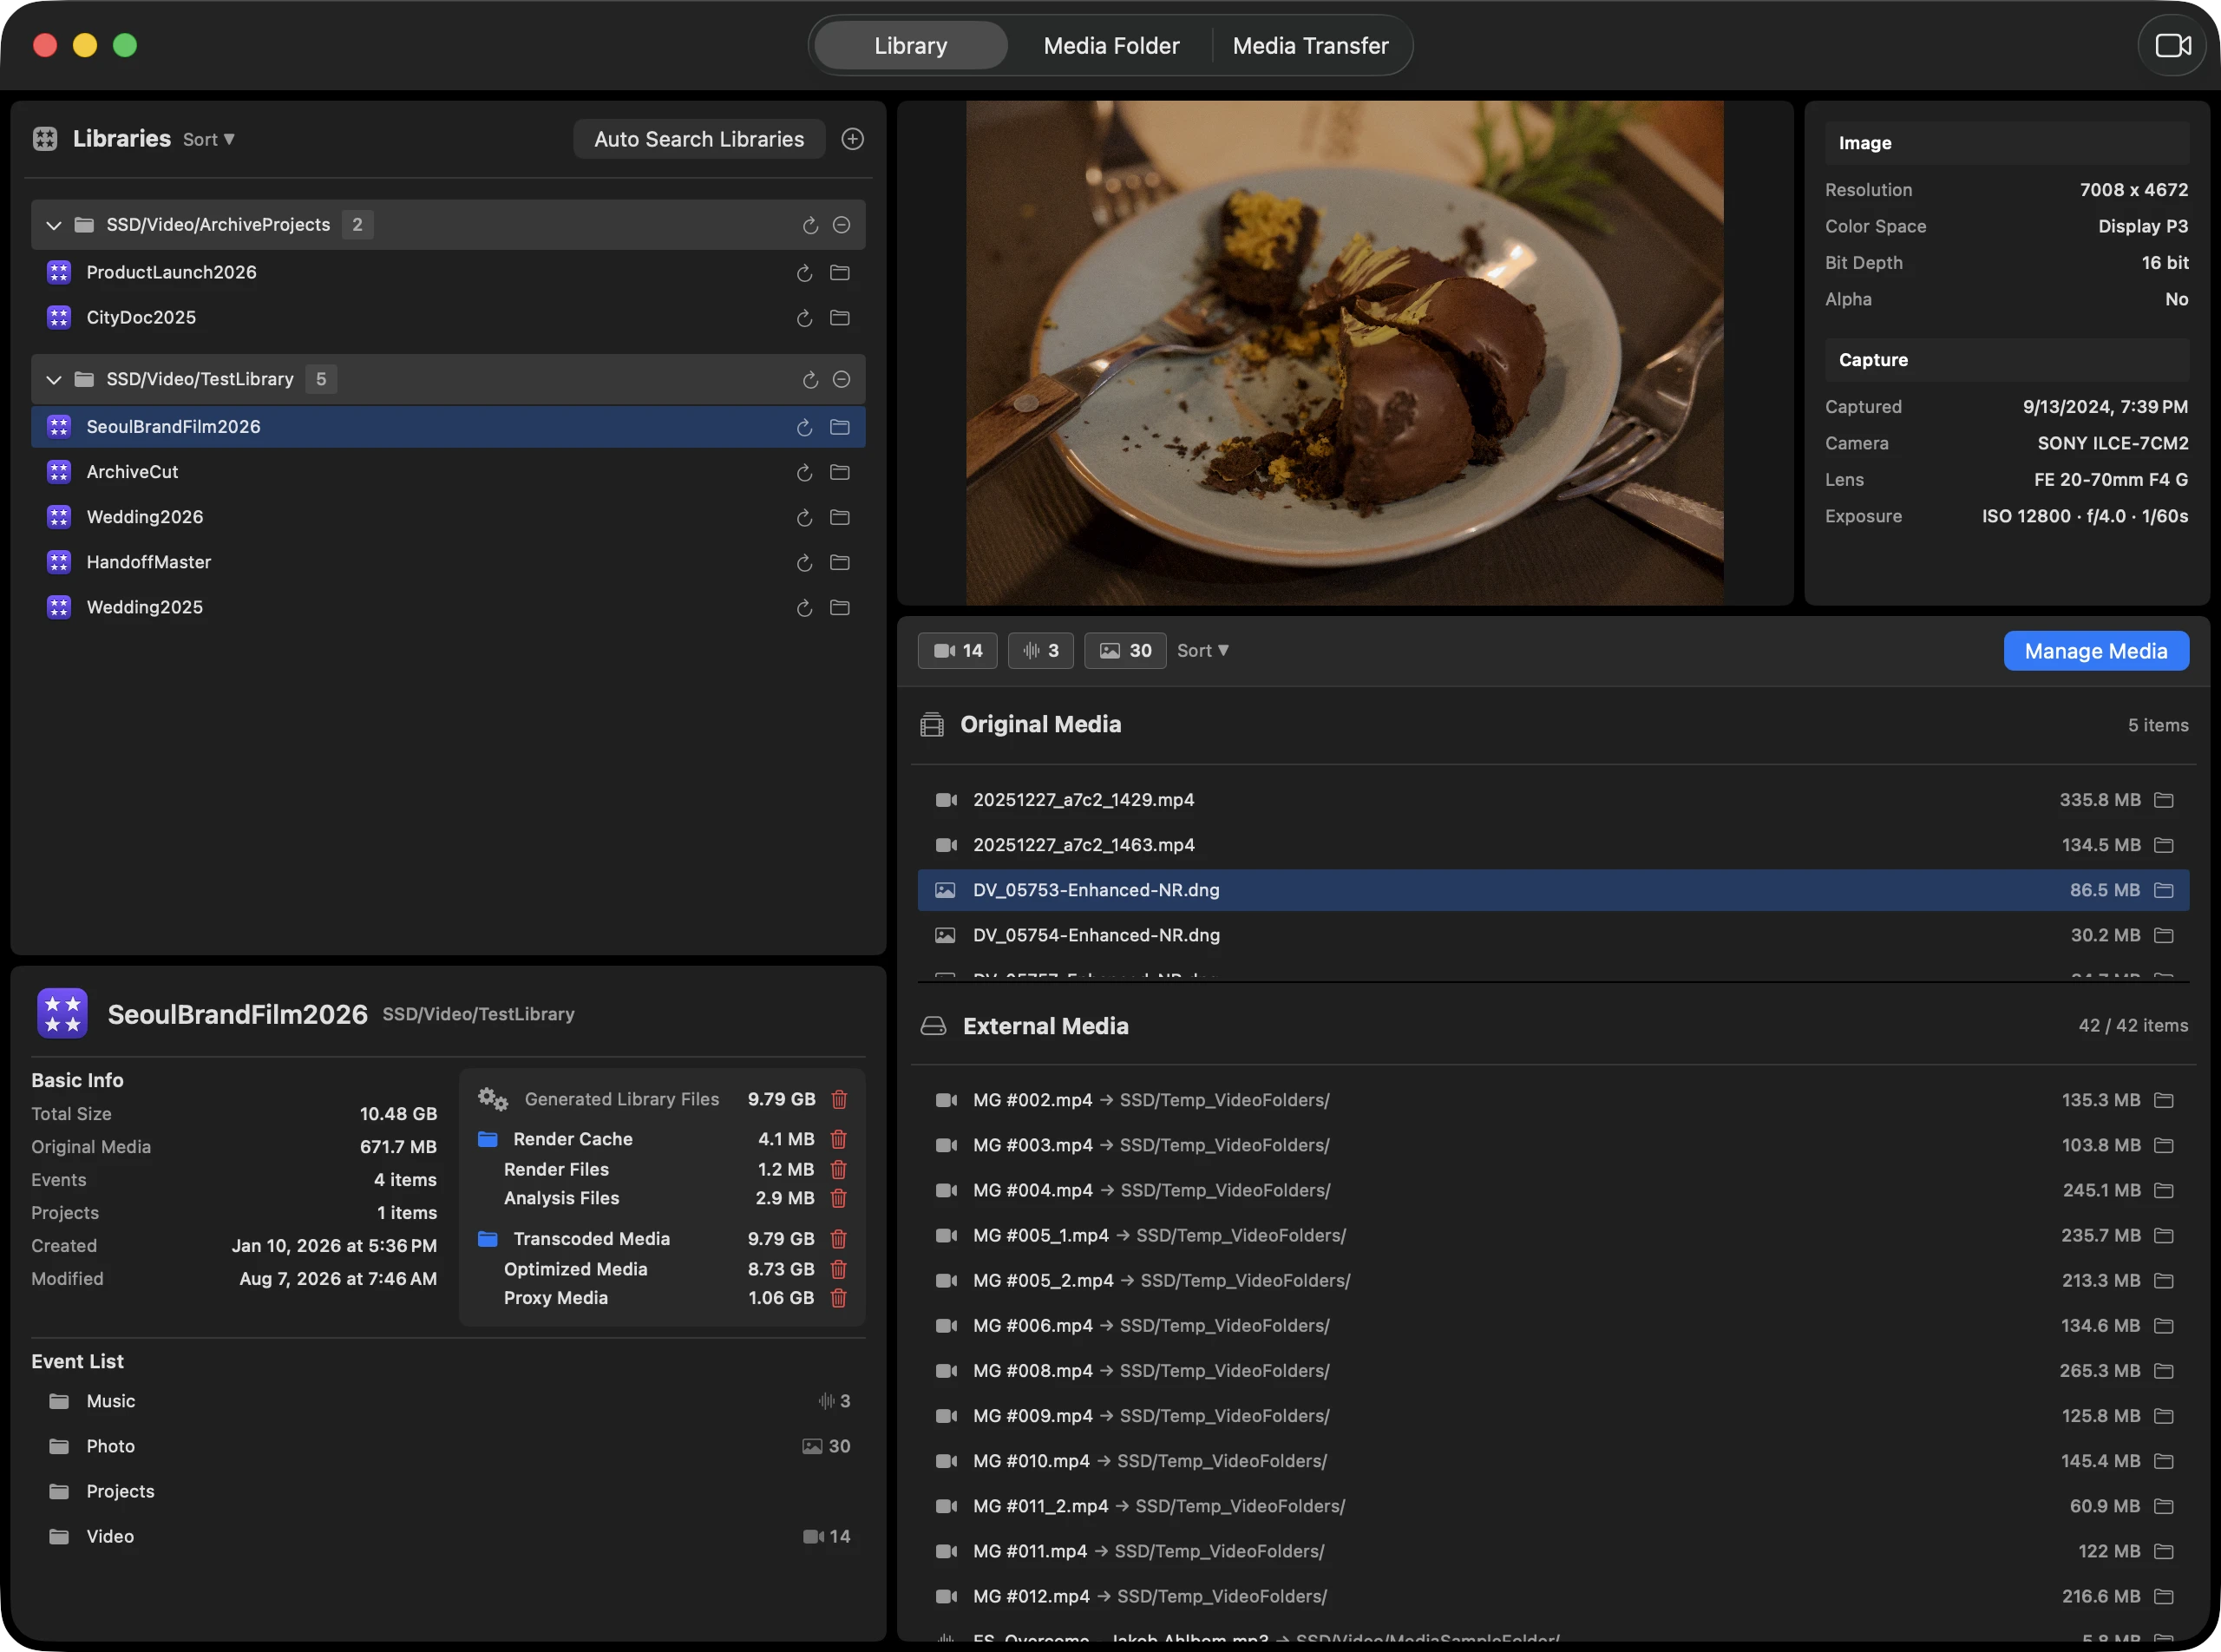
Step 1 / 5
Verify the library name and parent path.
How to use it
What this feature does
- Library analysis and generated-file cleanup are free, with no sign-in or subscription required.
- Render Cache groups render and analysis files; Transcoded Media groups optimized and proxy media.
- Clean up an individual category or the Render Cache or Transcoded Media group. Review the target and scope in the confirmation before deleting.
- Basic Info reports total size, original-media size, event and project counts, creation date, and the latest detected modification date.
- Generated Library Files separates render cache, render files, analysis files, optimized media, and proxy media so rebuildable data can be evaluated independently.
- Cleanup controls target individual generated-media categories instead of treating the whole library as disposable.
- Video, audio, and image cards are toggle filters; event rows add an event-level filter and display their media counts.
- Changing either filter immediately narrows the shared file lists on the right.
When to use it
Before archiving the library, if you need to reduce its size, first check Basic Info and Render/Cache, compare media counts by event to find the largest events, then select actual files from the right Original Media list to inspect them.
Operational notes
- If several libraries share an external generated-media folder, cleanup can affect more than the selected library. Review the target paths, item counts, sizes, and shared-folder notice in the confirmation.
- Final Cut Pro can regenerate these files when needed; rebuilding takes time and storage. Make sure the original media is available.
- If total size and original-media size differ greatly, compare generated files and External Media before deciding what can be removed.
- Render, analysis, optimized, and proxy files may be rebuildable; original media and external targets require a different level of care.
- Event-level counts identify which editing unit contains the most media without opening every event in FCP.
- The panel is dimmed during reanalysis because its values and event filters are being replaced with a new snapshot.
Manage Links with Auto RelinkPro
Auto Relink reviews link status, externalizes original media, changes media locations, and repairs broken symbolic links.
Step 1 / 5
In the Library tab, click the Media Management button in the media toolbar, then open Auto Relink.
How to use it
What this feature does
- Link Status is a read-only inventory that groups original media and symbolic links by state and shows their current drive distribution.
- Externalize Original replaces an internal original with a link only when a usable external copy is available; if no copy exists, create one with Media Transfer first.
- Change Media Link repoints an existing symbolic link to another verified location without moving the media file itself.
- Repair Links separates offline-volume links from genuinely missing targets and ranks exact and estimated replacement candidates.
- Each executable tab groups bulk choices by folder under its drive and shows selected/available for every row. Files at a branch point appear in a separate Files directly in … row.
- Filename search is shared across the tabs and also limits summaries, available folder rows, and the items that will be executed.
When to use it
If an external drive name changed and FCP reports Missing Media, check the library state in the Library tab, then open link repair in Media Management. Confirm and select the replacement candidate found by the app, run the repair, and verify that the file list returns to a normal state.
Operational notes
- When multiple candidates appear, compare volume, folder structure, filename, and byte size; exact matches are safer than inferred matches.
- Bulk repair automatically arms byte-exact candidates, while uncertain or unmatched entries remain a manual decision.
- Reconnect an offline drive before repairing its paths; a temporarily unavailable volume may not need any link change.
- After any externalize, change, or repair action, return to Library Analysis and verify the new link state.
Find External Media Usage in Reverse Tracking
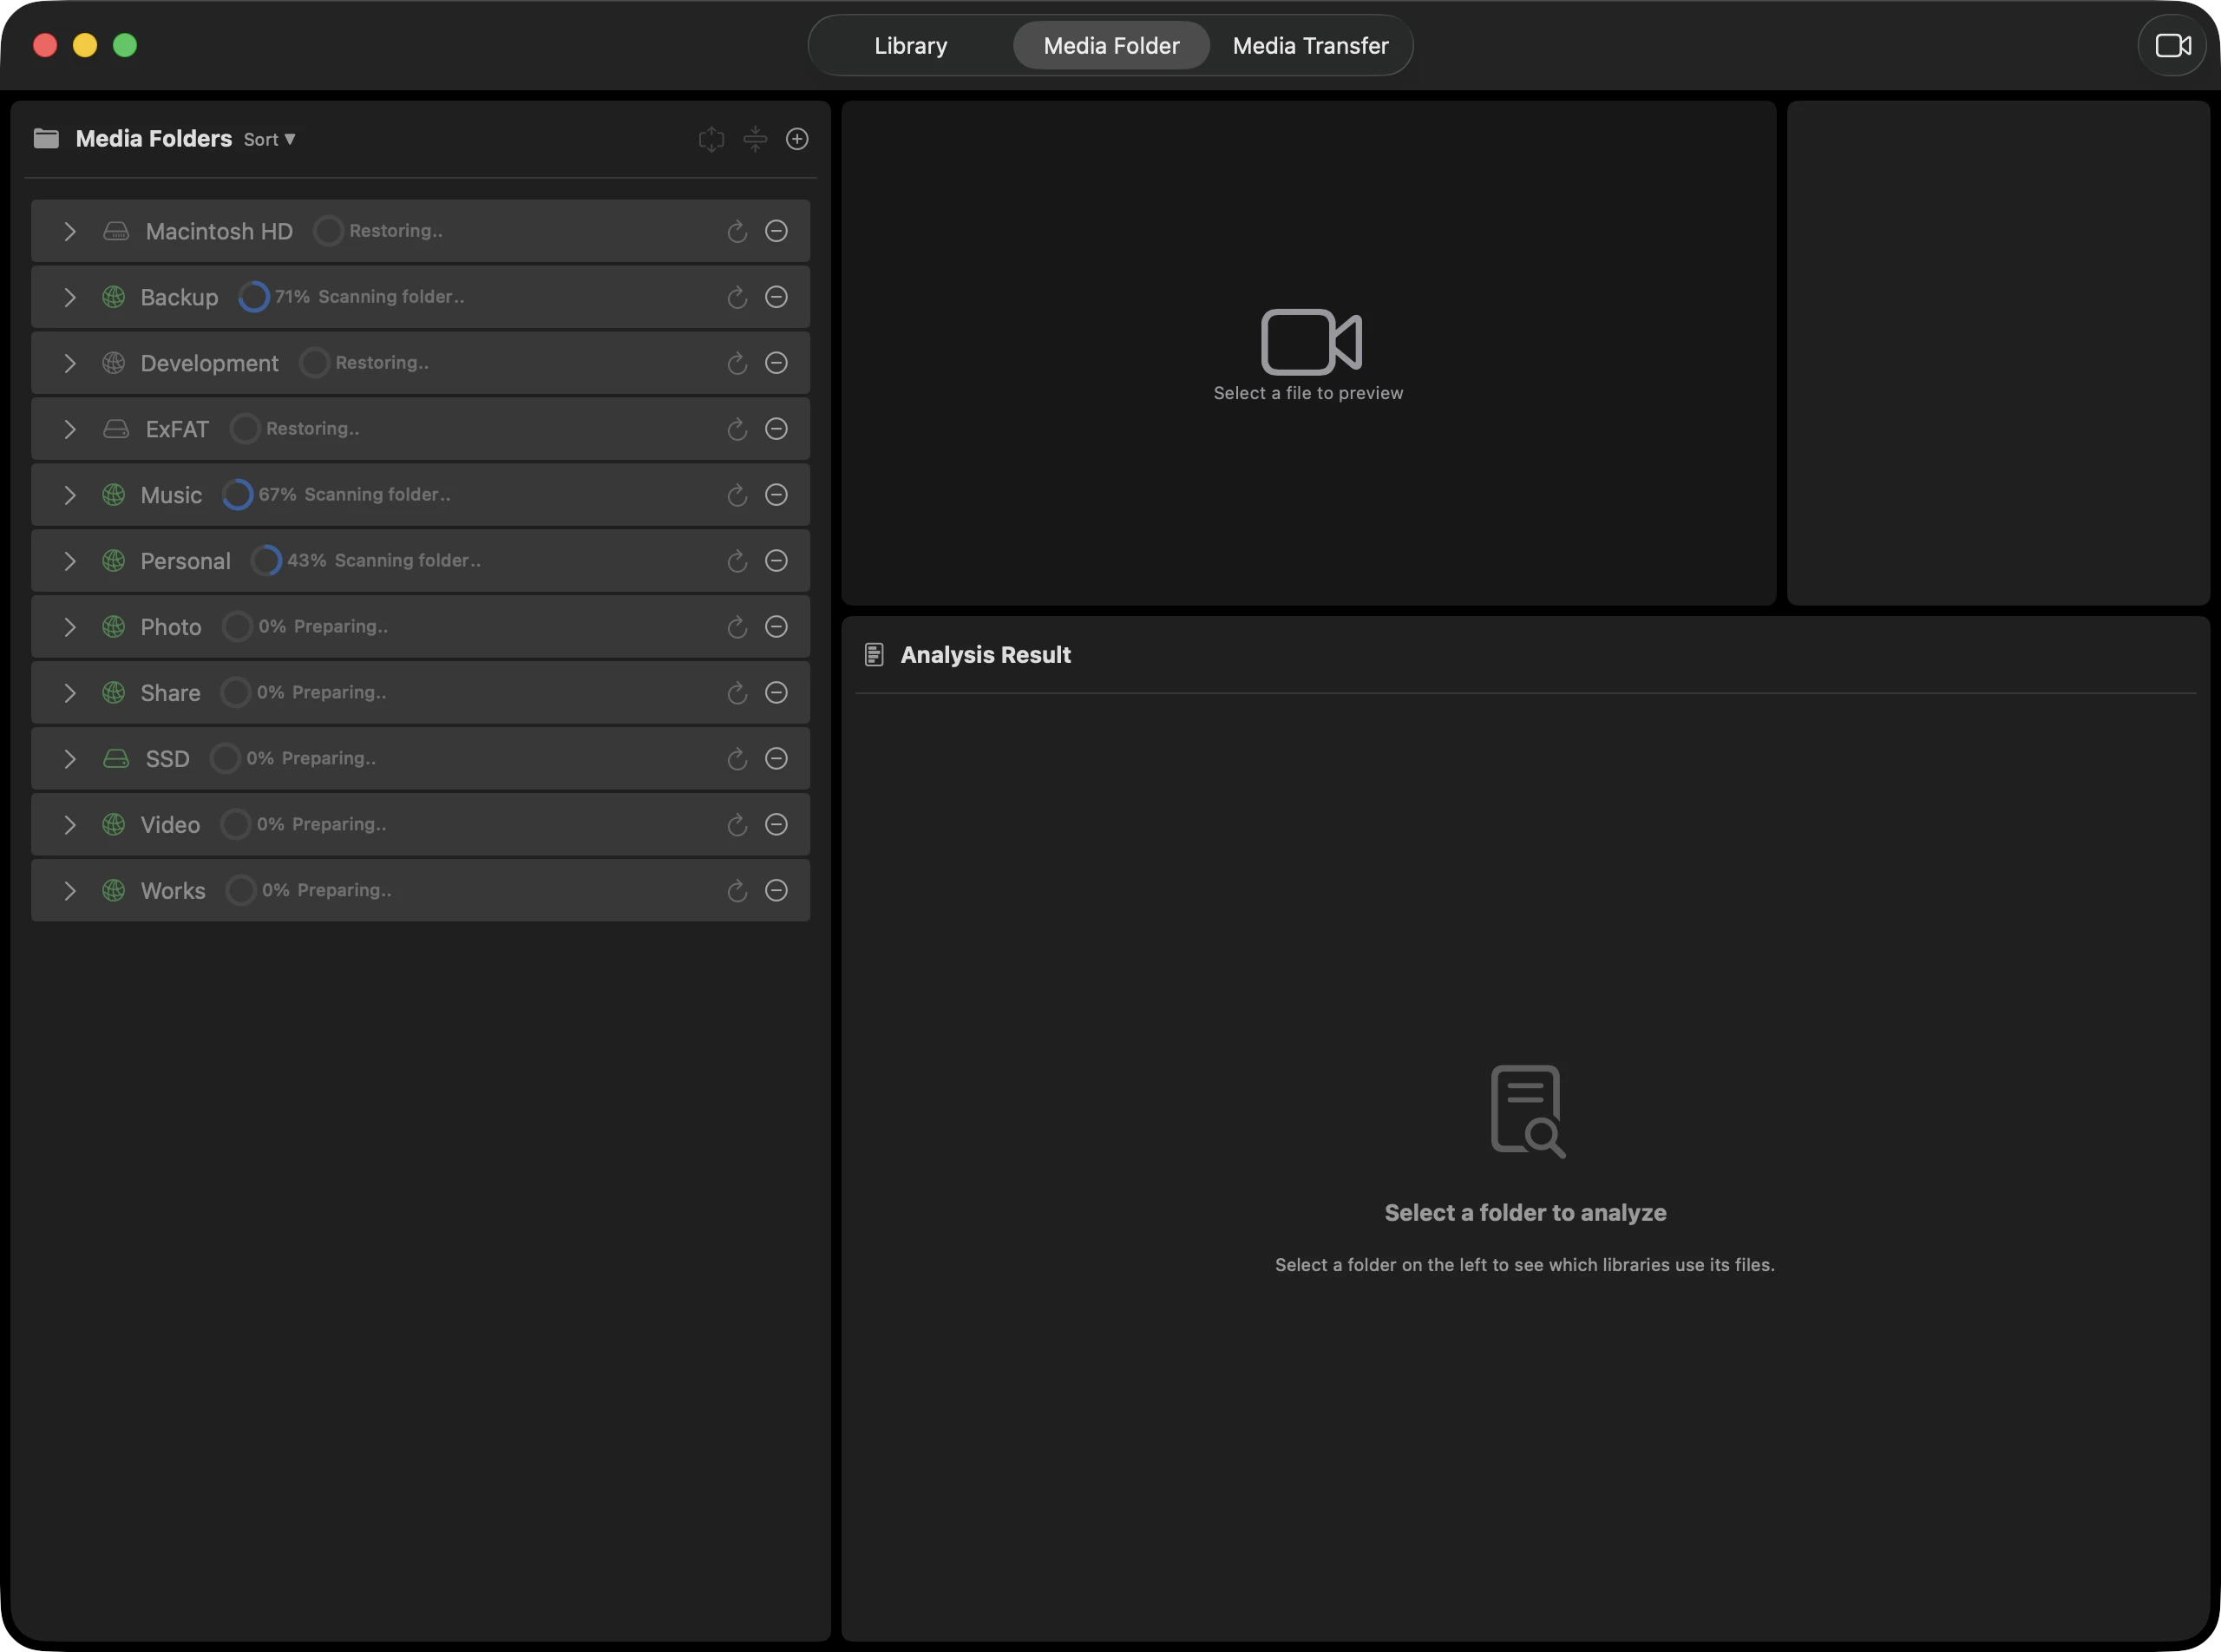
Reverse Tracking starts from media folders and traces which FCP libraries reference each folder or file.
Step 1 / 5
Add media folders from the + button.
How to use it
What this feature does
- Folder access is saved with a security-scoped bookmark so registered media folders can be restored after relaunch.
- The folder tree supports sorting, expanding or collapsing a selected subtree, and keyboard navigation for large storage hierarchies.
- Analysis Result summarizes total, linked, relinkable, and unused files, then separates Libraries in Use from Relinkable Libraries. Both sections can appear together for a selected folder or file.
- Selecting a matched file synchronizes the preview and Media Info, and full-screen navigation stays within the current result set.
- Unused-file deletion is offered only when the current analysis qualifies; a confirmation sheet shows the exact candidates before anything is removed.
When to use it
Before cleaning an external SSD, register the media folder in Reverse Tracking and confirm which files are referenced by libraries.
Operational notes
- Cached analysis is intentionally retained until refresh, so results remain reviewable instead of changing underneath the user.
- Before analyzing shared storage or NAS folders, confirm the volume is mounted and that Footage Manager still has access.
- No matches means no match within the libraries the app currently knows; add or refresh relevant libraries before treating a file as unused.
- For deletion candidates, prefer a recoverable holding-folder workflow unless the storage policy and backup have been verified.
Distinguish Missing Files from Offline Volumes
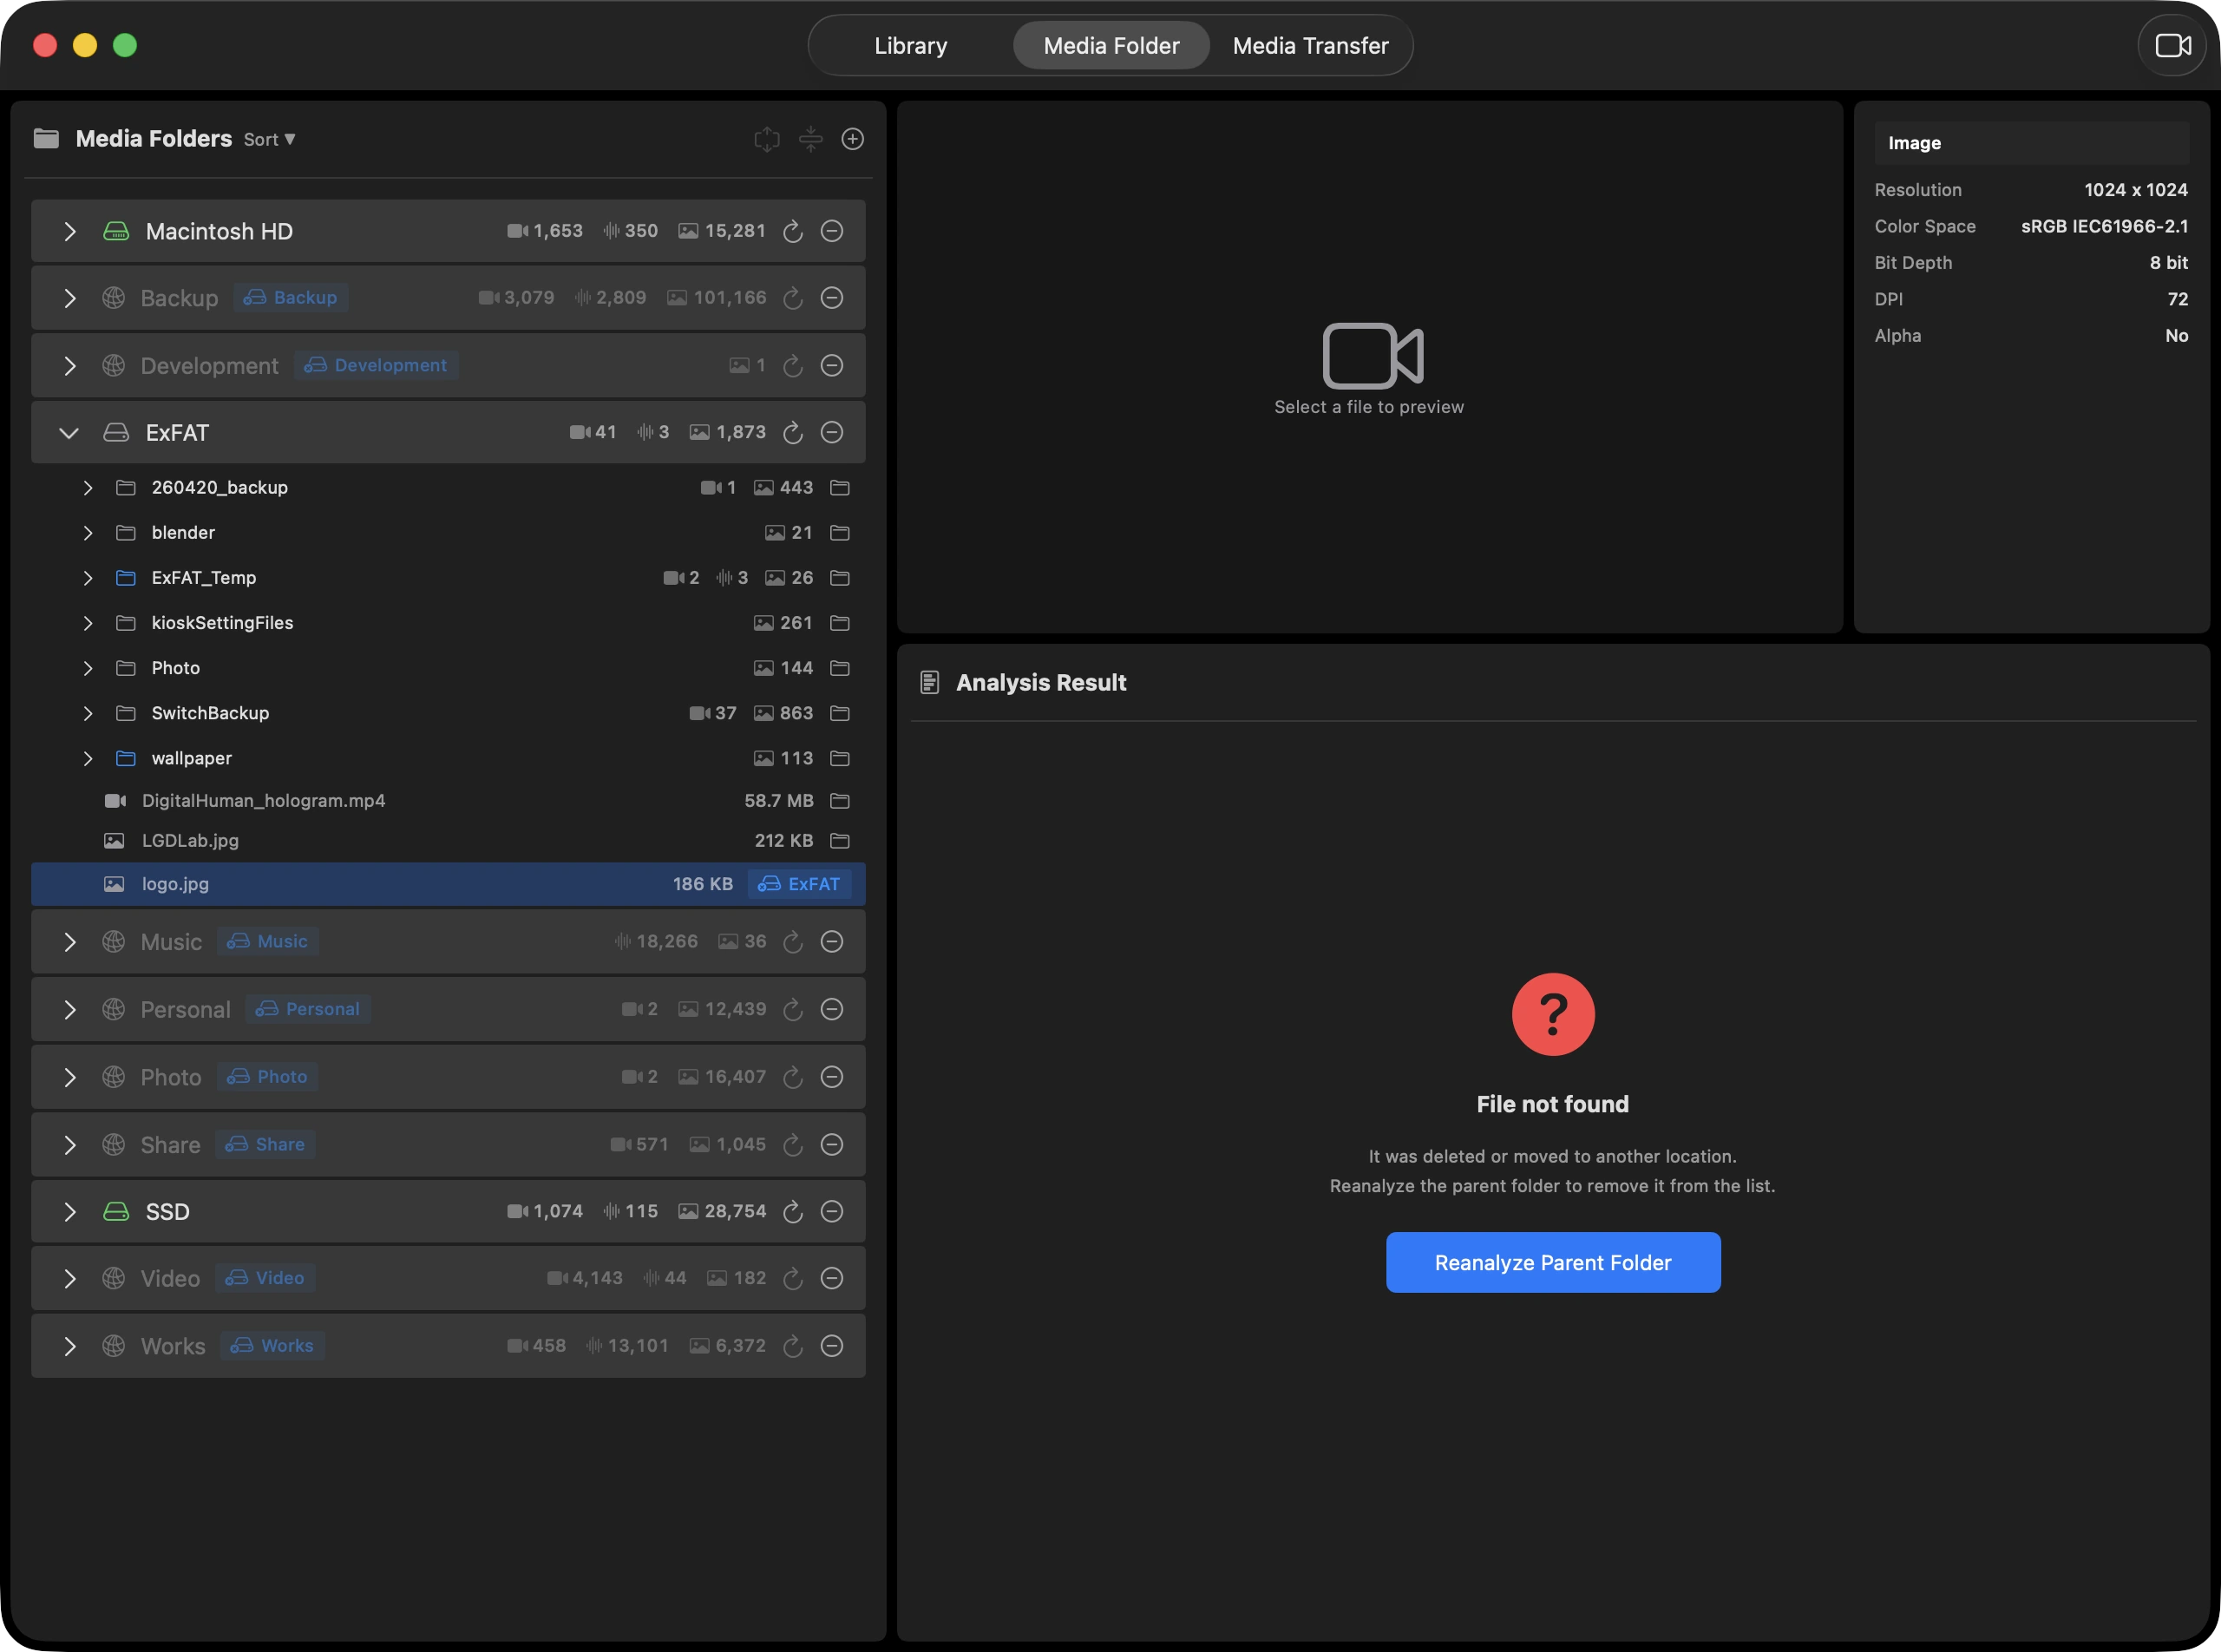
Reverse Tracking preserves the last analysis when a registered file or folder disappears, then lets you restore access or explicitly reanalyze its parent instead of silently replacing the evidence.
Step 1 / 5
Select the file or folder marked as unavailable.
How to use it
What this feature does
- Missing files and missing folders have separate inline states and reanalysis actions.
- An offline SSD or NAS is treated differently from a path that is missing on an available volume.
- The previous snapshot remains visible until the user requests reanalysis, protecting useful historical evidence from an accidental overwrite.
- Reanalysis updates both the folder tree and the library-usage result for the affected selection.
When to use it
Use this flow after a teammate renames a media folder or when an archive drive was disconnected between sessions. Restore the expected path first, or reanalyze only after confirming that the storage change was intentional.
Operational notes
- Do not interpret a missing badge as permission to delete related records or media.
- For network storage, verify mount state, permissions, and reachability before reanalysis.
- Reanalyzing an intentionally changed parent is safer than repeatedly refreshing an obsolete child path.
Review Files with No Library Matches
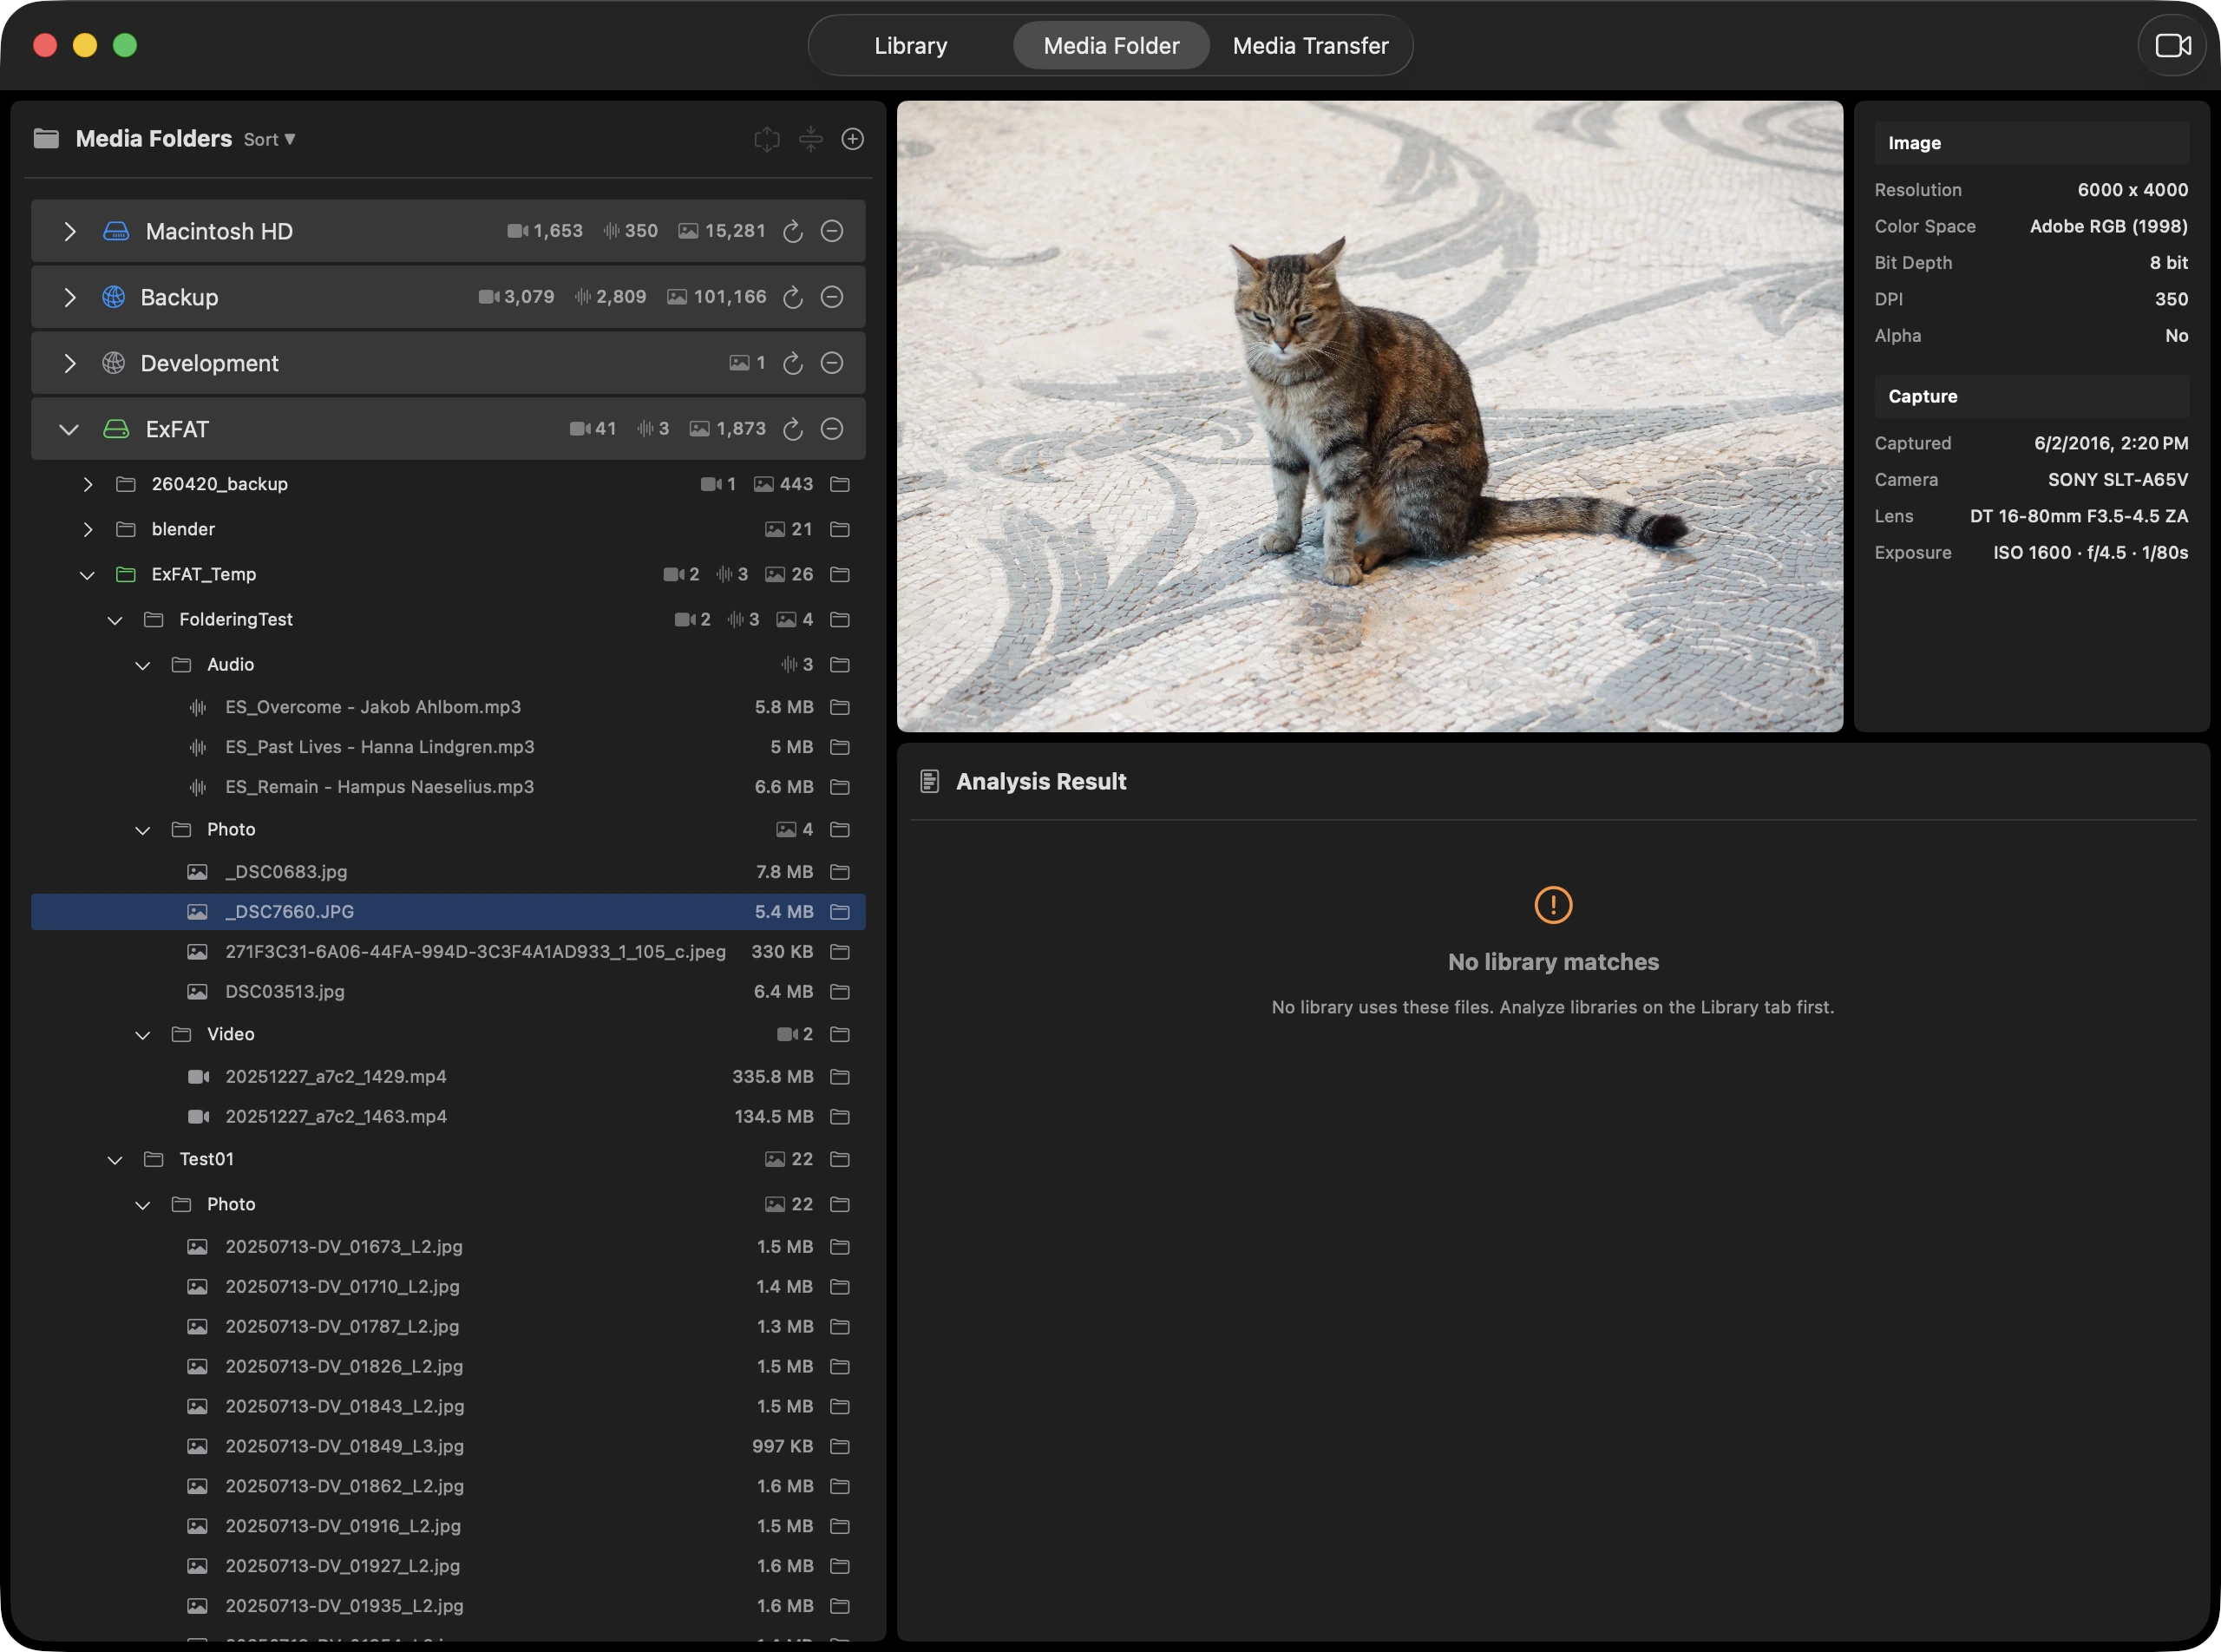
When Reverse Tracking finds no known FCP library using a selected file, it shows a no-match result so you can verify the analyzed libraries before cleanup.
Step 1 / 4
Select a file that shows no library match.
How to use it
What this feature does
- No match means no reference was found in the libraries currently known to the app.
- A file can become matched after another library is added or refreshed.
- The result is based on the app's current reverse index, not every library that may exist elsewhere on your storage.
- Treat the result as cleanup evidence, not as an automatic deletion decision.
When to use it
Before clearing a shared media folder, inspect no-match files and refresh any recently changed libraries so the result reflects the current edit state.
Operational notes
- Make sure every relevant FCP library has been added and analyzed before relying on a no-match result.
- For external or network storage, confirm the volume is mounted and reachable.
- Move deletion candidates to a holding folder first when additional verification is needed.
Move and Organize Files in Media TransferPro
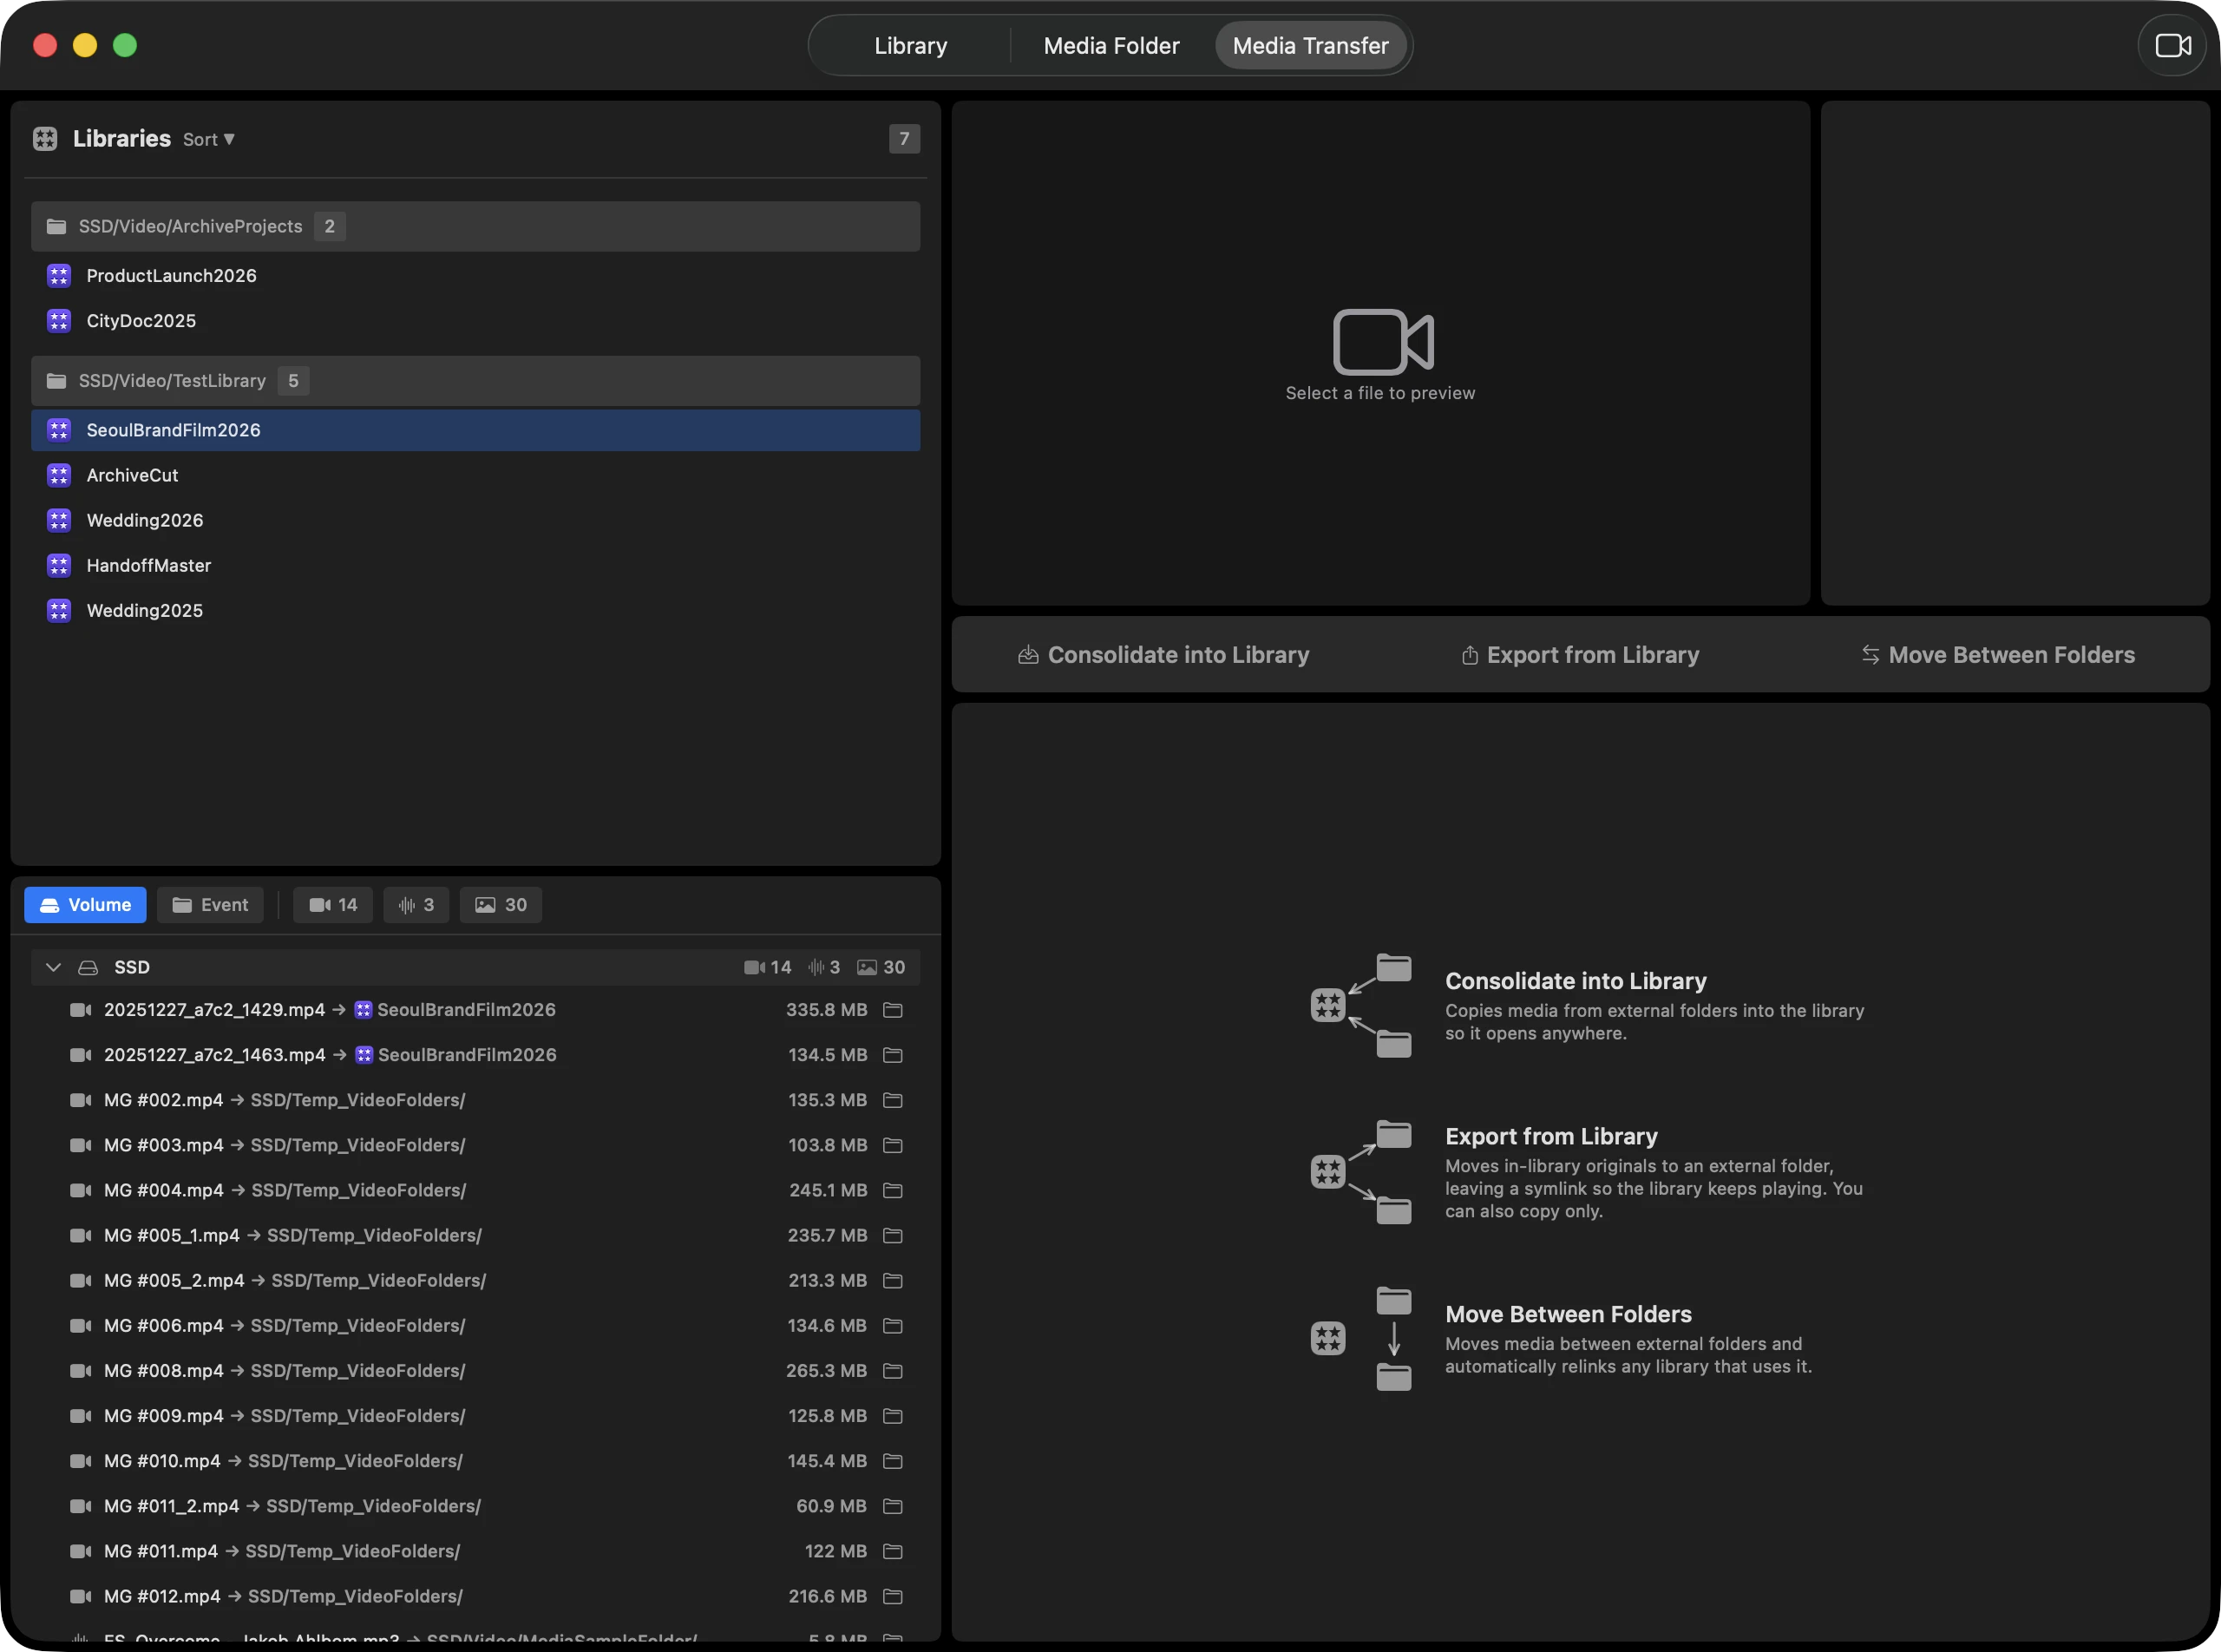
Media Transfer executes copy and move workflows. Choose a transfer mode, assign files to destinations, resolve conflicts, and verify the result.
Step 1 / 5
Expand a folder group and select a library after checking its full parent path.
How to use it
What this feature does
- Media Transfer uses the same folder-grouped library list as the Library tab, so the parent path distinguishes libraries with the same name.
- Library Embed filters the list to External Media and turns selected symbolic links into real files inside the library.
- Media Transfer filters to Original Media and copies or moves those files to one or more external destinations.
- External to External filters to external targets and backs up, relocates, or moves them between storage locations.
- Files can be assigned to destination queues by drag and drop; destination folders can also be added from Finder.
- Before execution, the app scans destination conflicts and lets you choose overwrite or skip per file or for the whole batch.
- Progress can be cancelled, and the result sheet reports completion while affected libraries are reanalyzed.
When to use it
Use Media Transfer to archive internal originals, or Library Embed to make a library self-contained.
Operational notes
- This tab can change real file locations, so confirm your backup before starting.
- A disabled mode usually means the selected library has no eligible media or its current media-storage configuration is incompatible with that operation.
- Deleted or inaccessible destination folders remain visibly distinct and cannot accept new assignments.
- After transfer, confirm link state again in Library Analysis or Reverse Tracking and open critical libraries in FCP.
Scenario 1. Export Internal MediaPro
Move or copy Original Media from inside the library to an external archive folder.
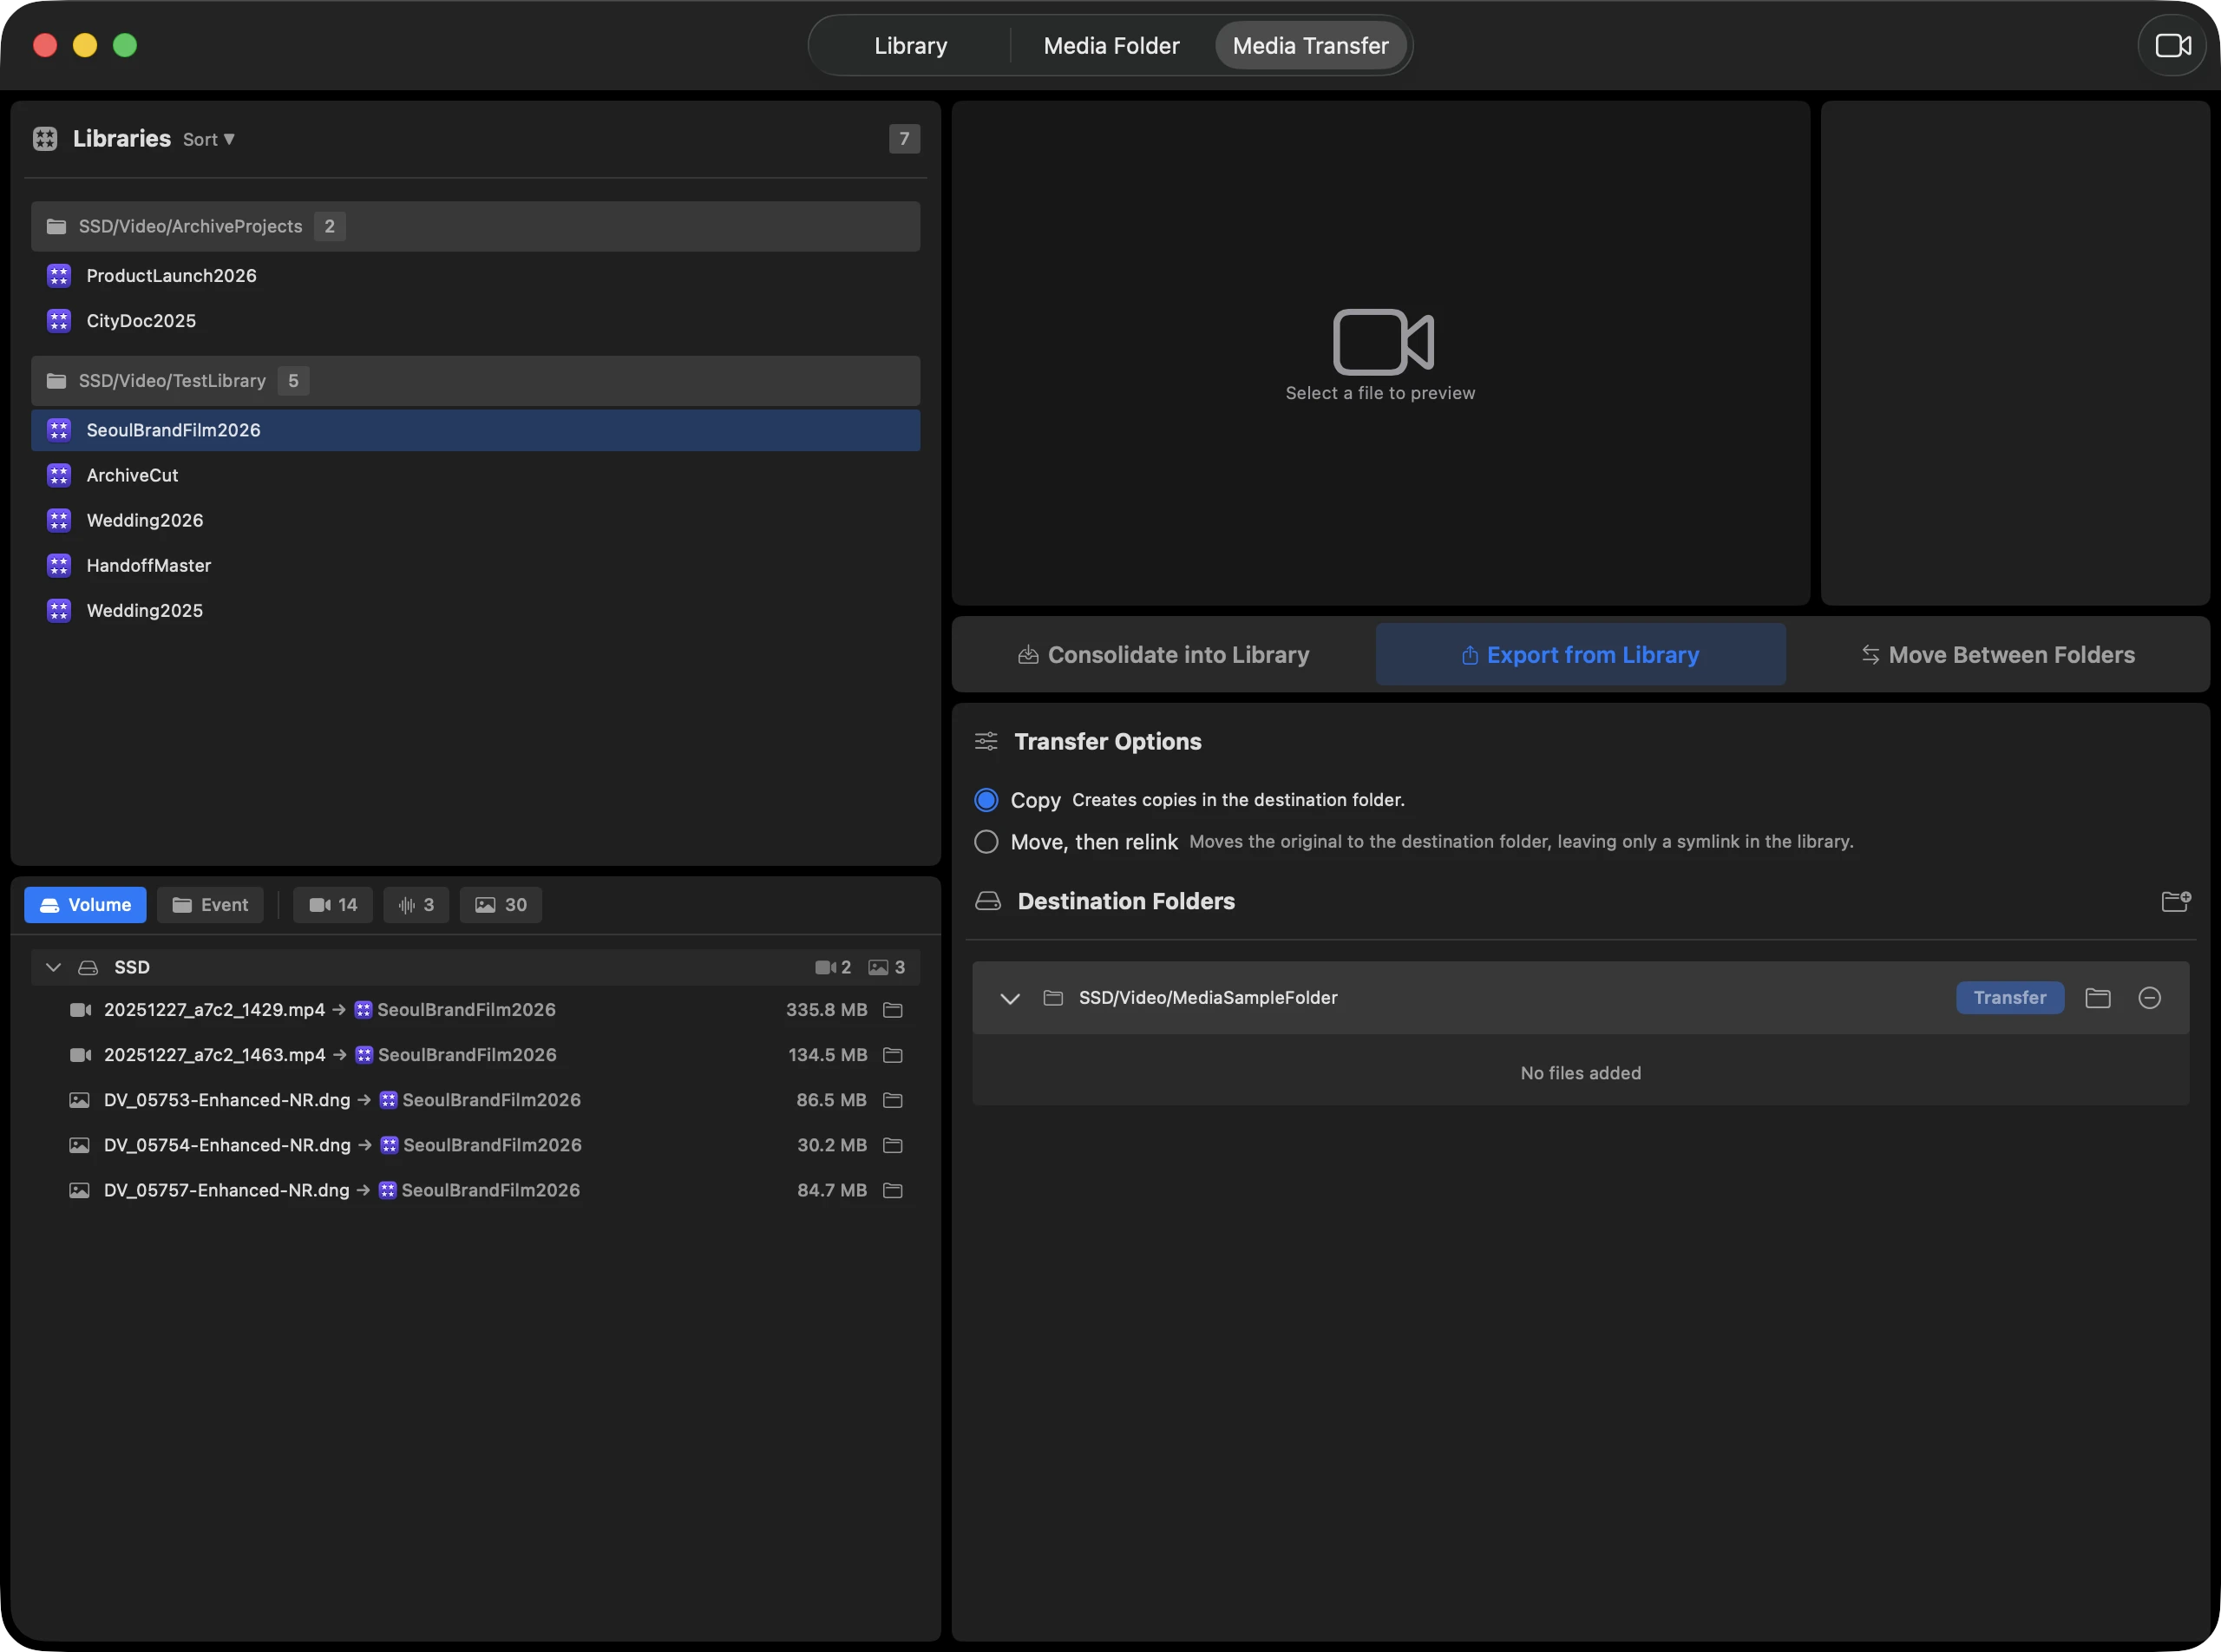
Step 1 / 5
Select the library in Media Transfer.
How to use it
What this feature does
- Backup keeps originals in place.
- Move relocates internal originals and replaces their former library locations with symbolic links to the destination.
- Multiple destination folders can hold independent queues, so media can be split by storage purpose in one workspace.
- Conflict resolution compares source and destination and supports overwrite or skip for each collision.
When to use it
Archive finished project media to NAS while keeping the library path valid through external-media links.
Operational notes
- Backup is the safer choice because it leaves originals in place.
- Move reduces library size but is harder to undo, so test with a small set first.
- If the destination already has files with the same names, decide whether to overwrite or skip before transfer.
Scenario 2. Embed External MediaPro
Convert external symlink media into real files inside the library.
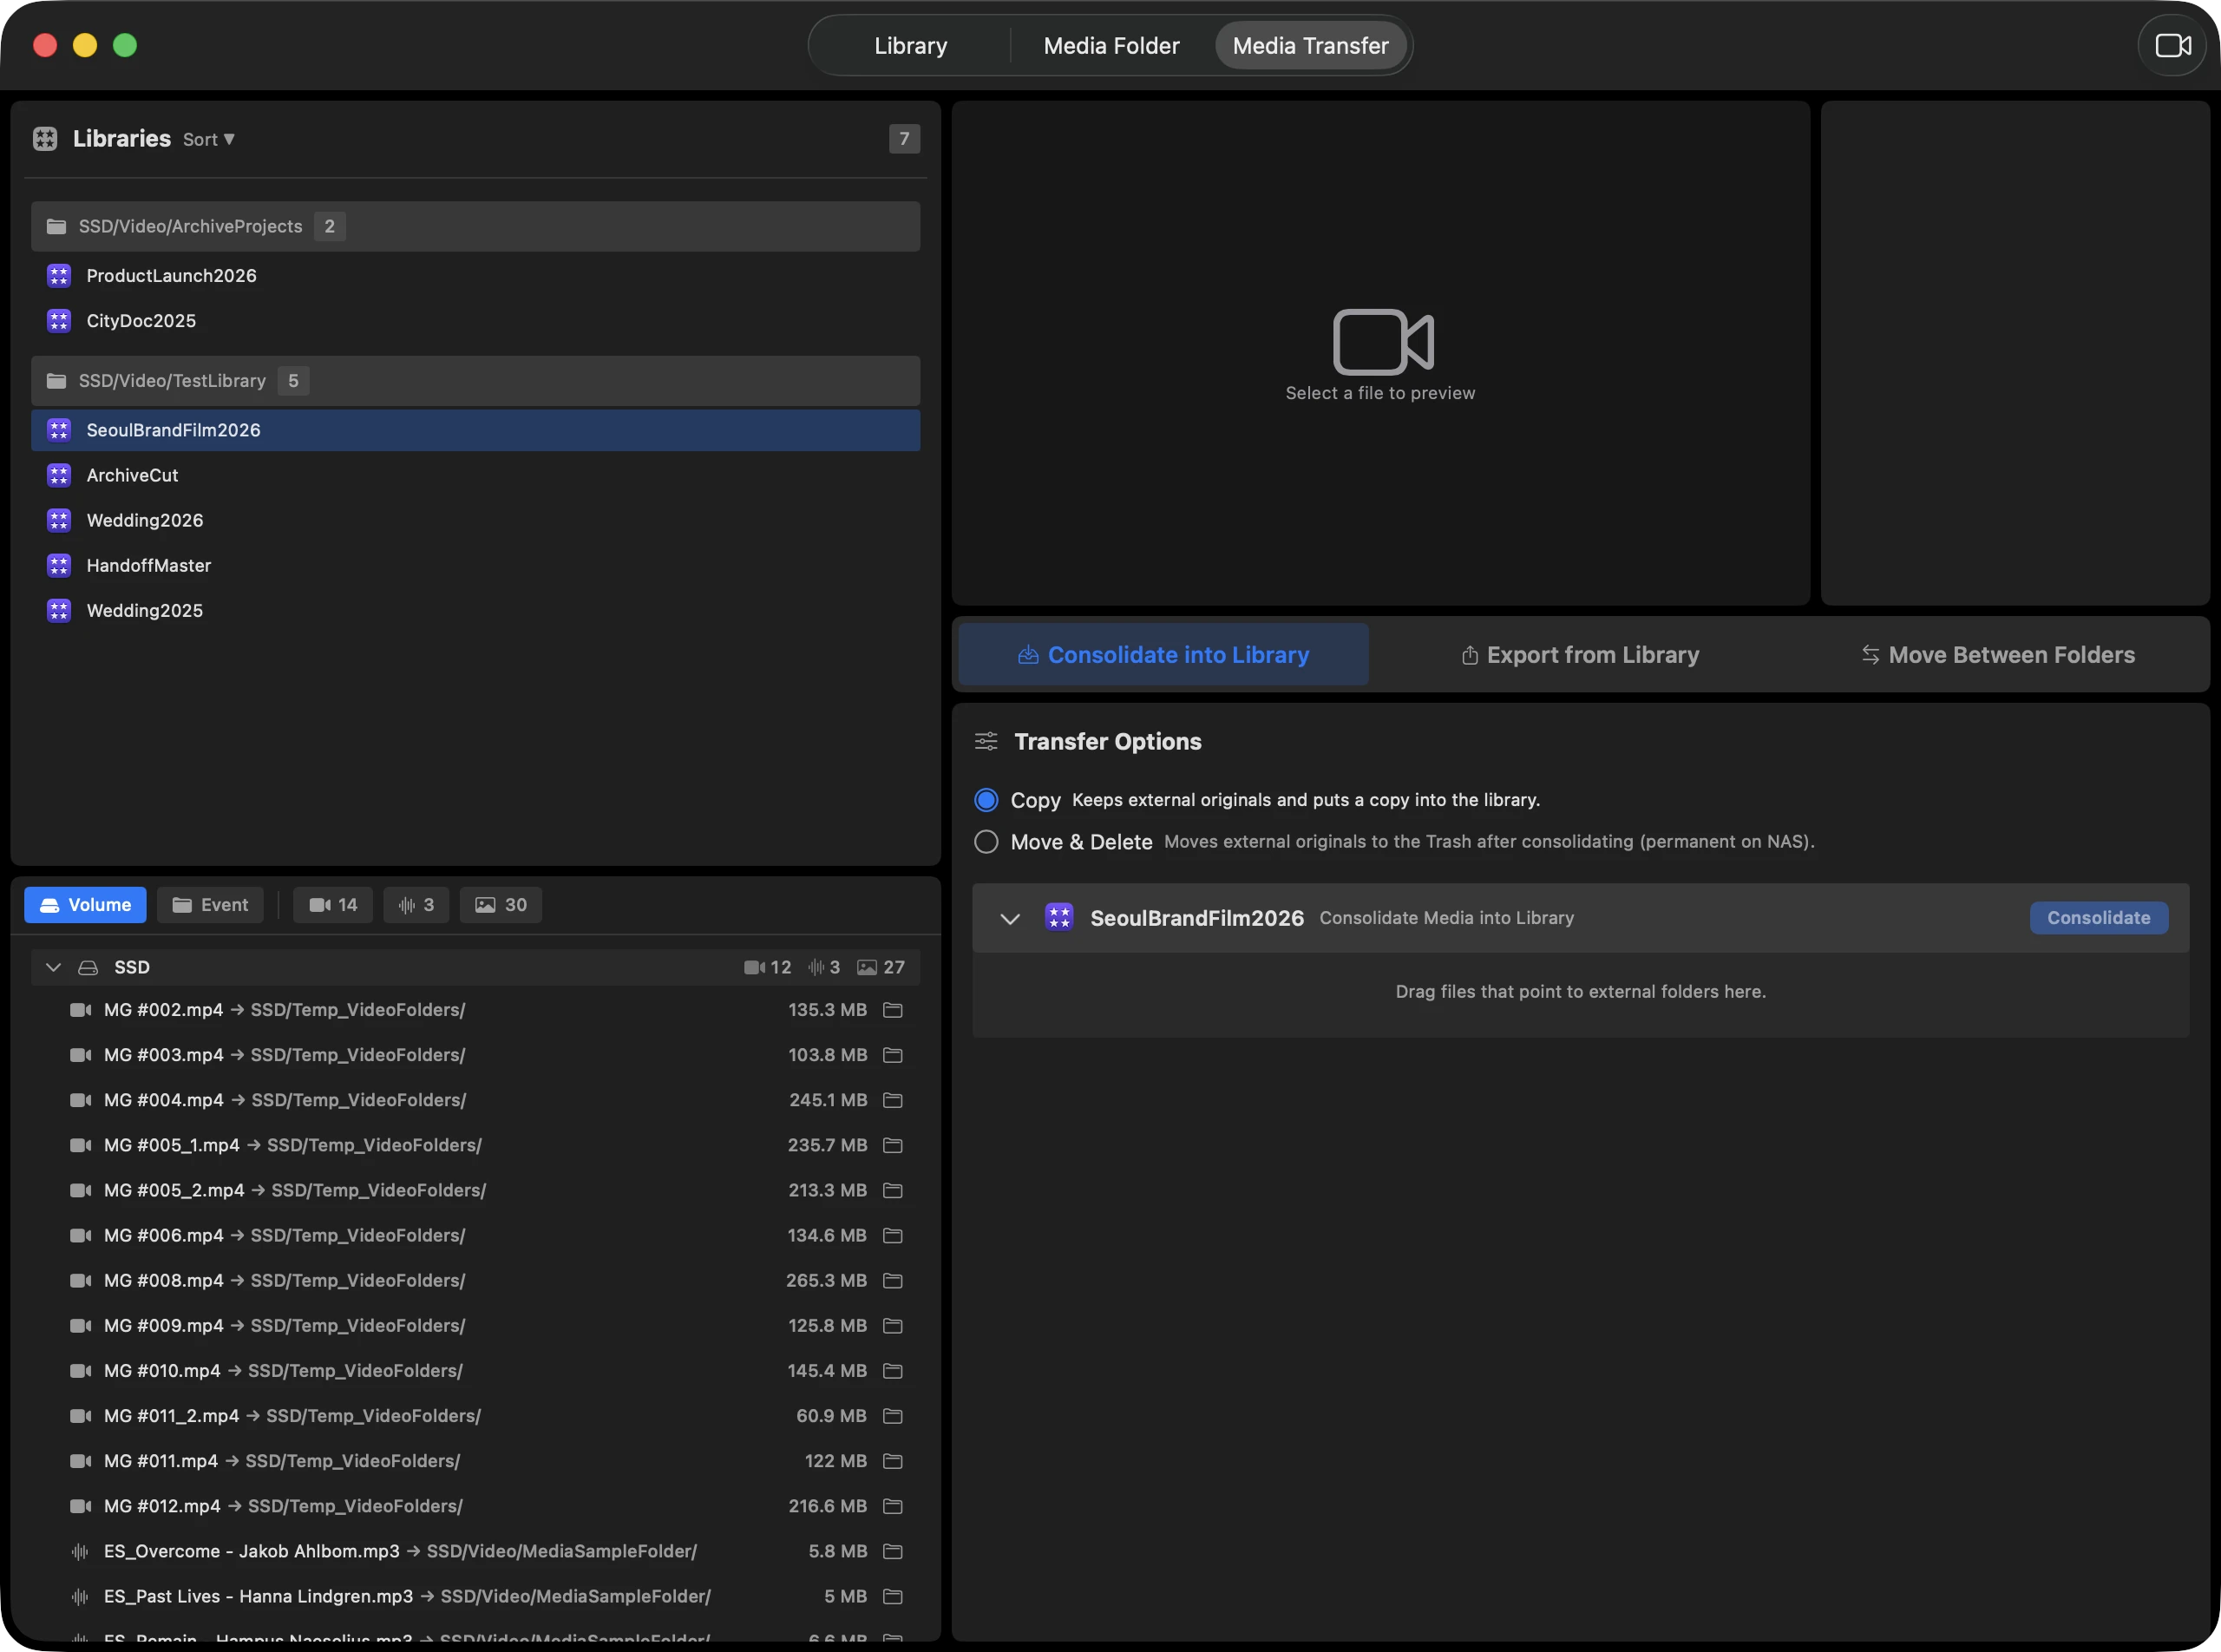
Step 1 / 5
Select a library with symlink files.
How to use it
What this feature does
- This mode targets symbolic-link files only and is copy-only when the external source must remain intact.
- Copy places a real file inside the library and replaces its symbolic link; Move & Delete can remove the external source after validation.
- Before destructive cleanup, the app warns when other libraries still reference the source or when a safe replacement cannot be confirmed.
- If validation or recovery fails, an integrity alert offers to open the affected library in FCP for direct inspection.
When to use it
Make a project self-contained before handing off a single .fcpbundle to a client.
Operational notes
- Embedding increases the library size, so check free space before running it.
- Use Copy for the safest handoff; use Move & Delete only after reviewing references from other libraries.
- If the library itself stores media externally, the app may direct you to Externalize Original before embedding is available.
- After completion, open the library in FCP and confirm media playback.
Scenario 3. Move External Media Between FoldersPro
Move symlink target files from one external folder to another while reviewing affected libraries.
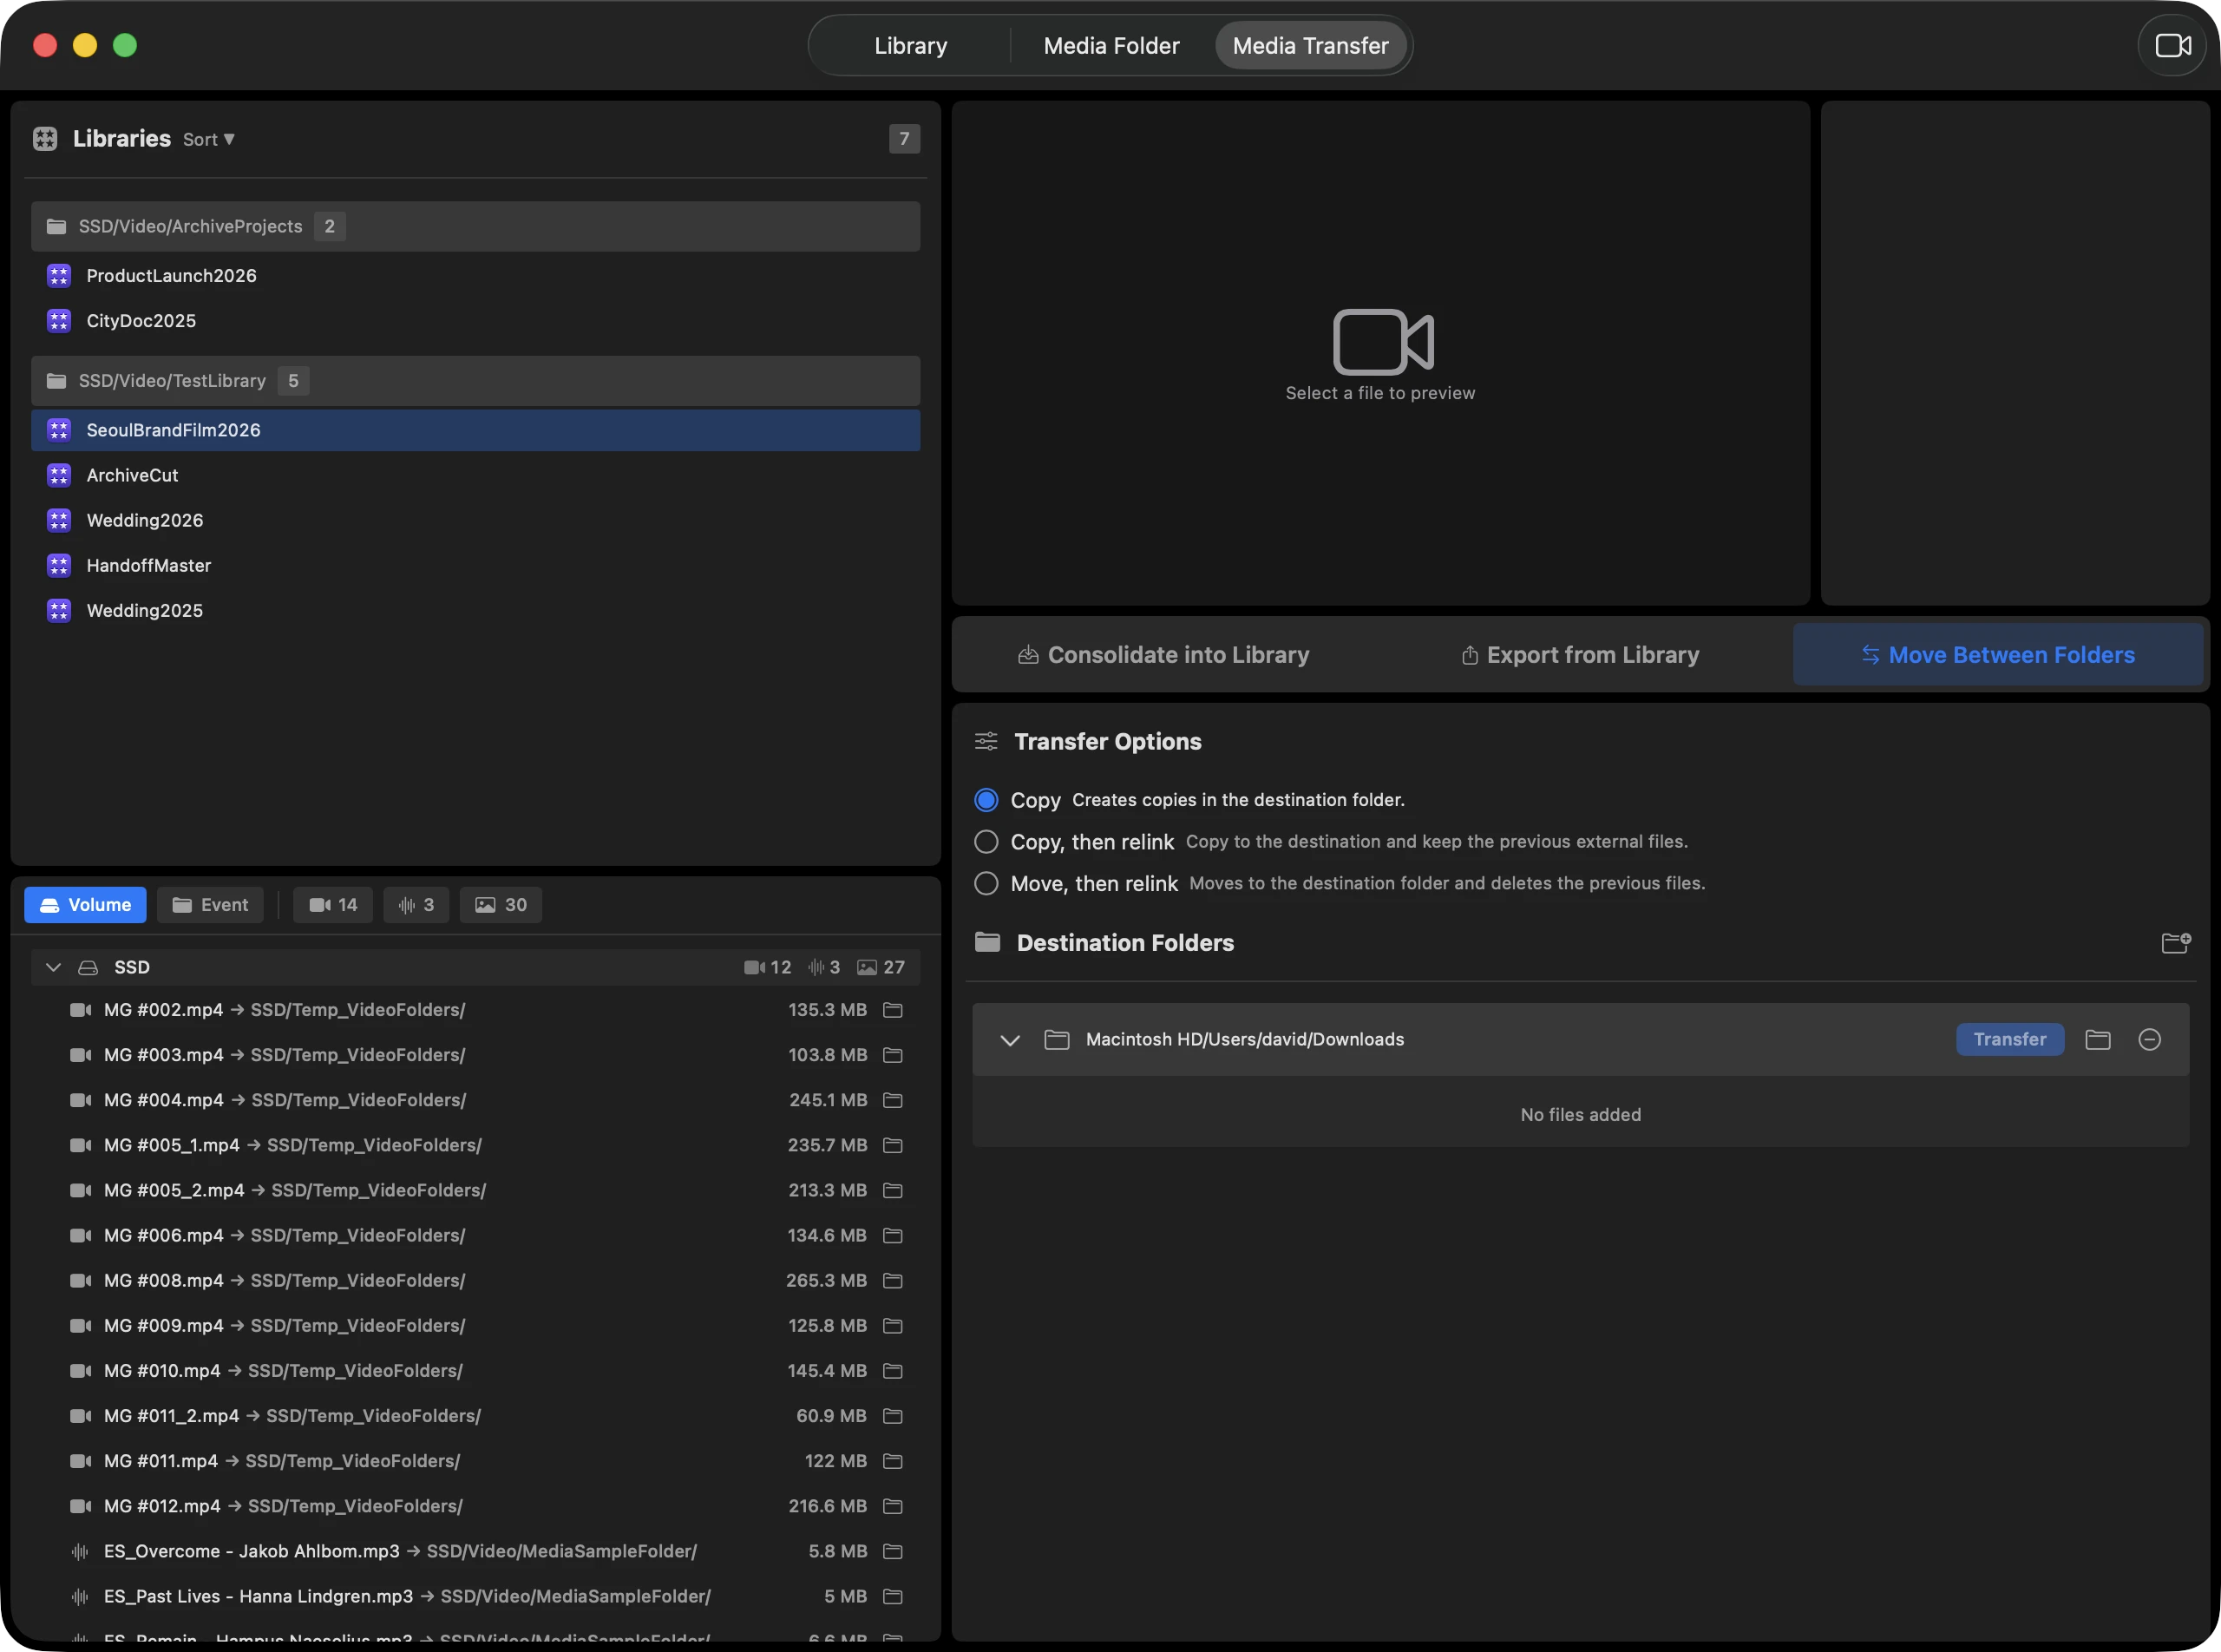
Step 1 / 5
Select a library with external symlinks.
How to use it
What this feature does
- Backup copies the external target and leaves existing links unchanged.
- Relocate copies the target and can repoint the reviewed libraries to the new copy while keeping the source.
- Move transfers the target, removes the source after validation, and updates the reviewed library links.
- Because multiple libraries can reference the same external file, an affected-libraries sheet appears before link-changing operations.
- A result sheet summarizes copied or moved files and the libraries queued for reanalysis.
When to use it
Move media from a working SSD to NAS while updating the related library links.
Operational notes
- One external file can be referenced by multiple libraries, so review the affected libraries carefully.
- Transfers to NAS may take longer because of network speed and permissions.
- Even with automatic updates enabled, open key libraries afterward and confirm their links.
Settings, Account, and Cache
Settings controls updates, startup behavior, account and device status, accessibility, confirmations, deletion policy, cache, tutorials, and support—not only troubleshooting resets.
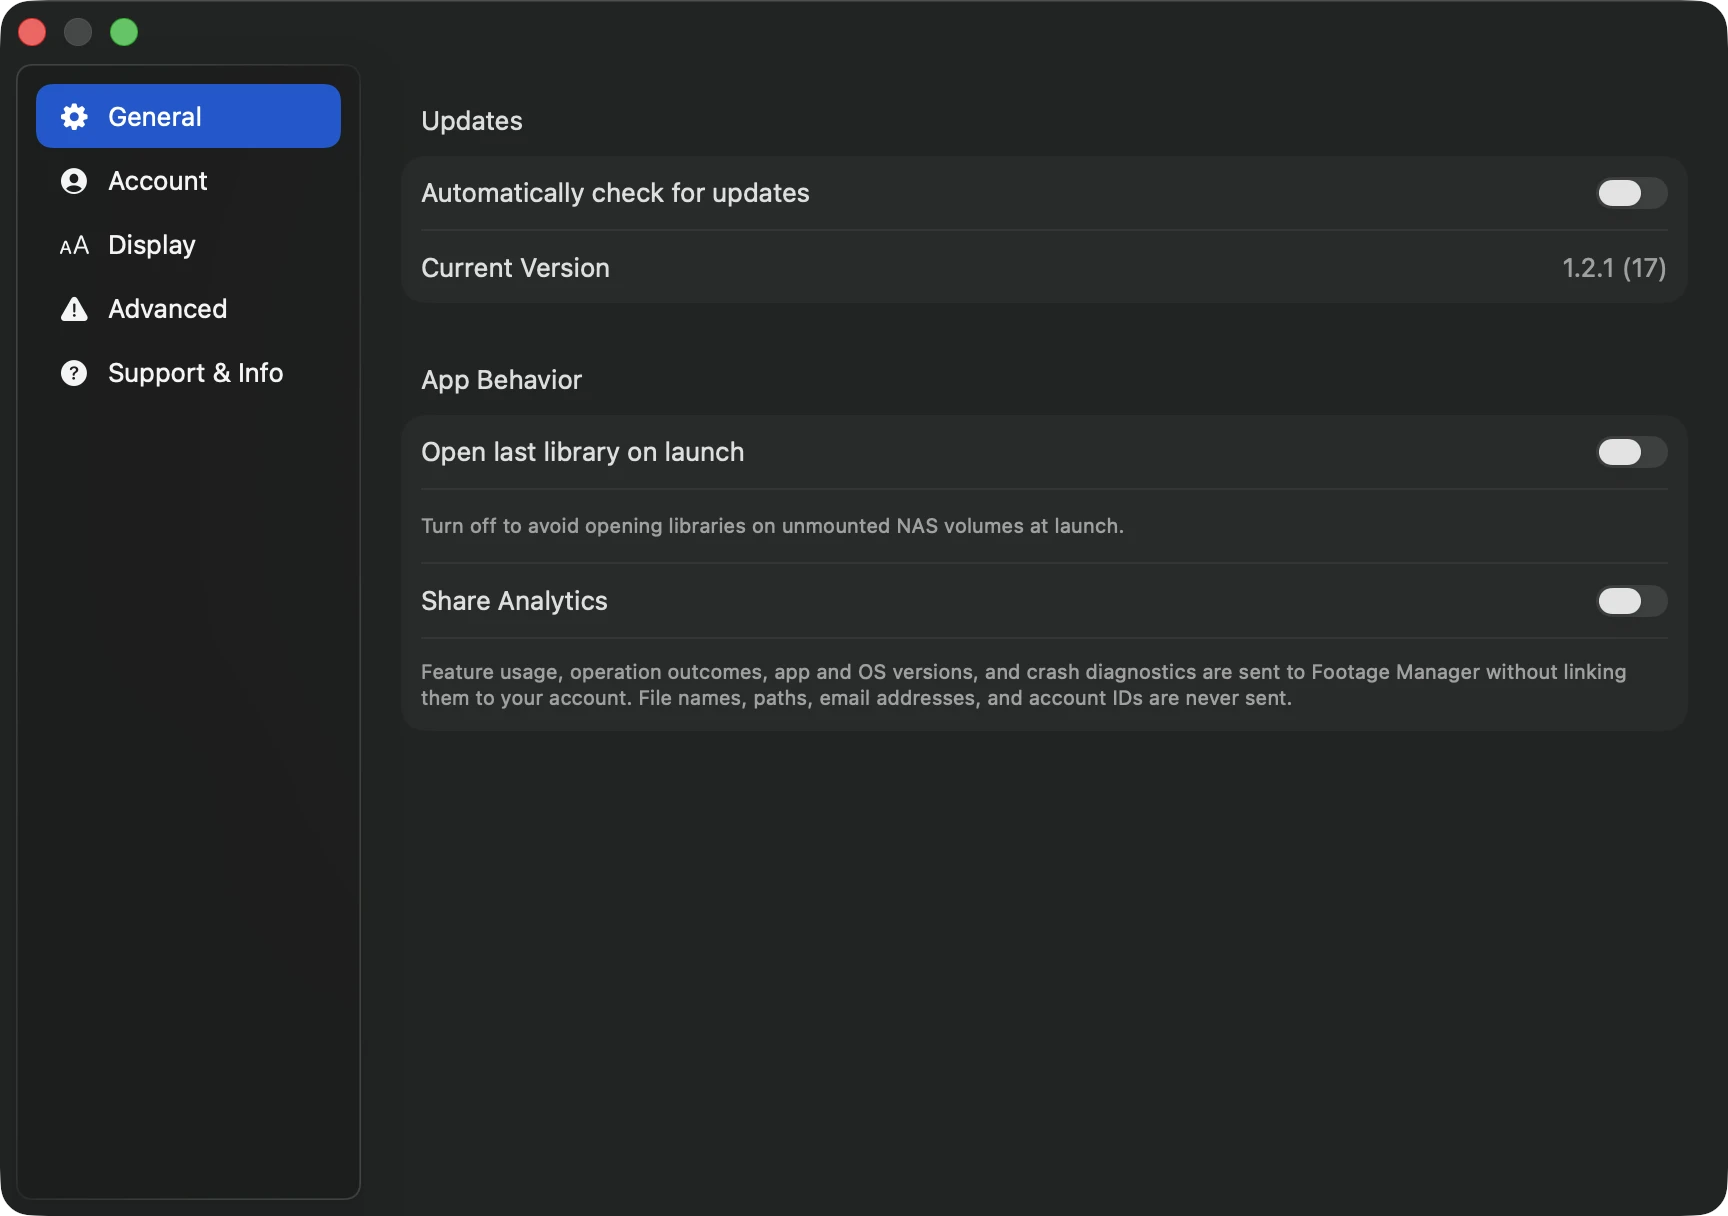
Step 1 / 8
Open Settings.
How to use it
What this feature does
- The first-launch prompt asks whether to send anonymous feature usage, operation outcomes, app and OS versions, and crash diagnostics. No analytics are sent before you make a choice.
- General controls automatic update checks, automatic loading of the last library, opt-in analytics sharing, and the exact app version and build. Analytics is off before consent, and filenames, paths, email addresses, and account IDs are never sent.
- Account shows access level, plan, subscription status, state-specific dates, and device activation. There is no in-app Delete Account button; Manage Account opens the web account page for subscription management, data export, and account deletion. Sign Out remains in the app.
- Display provides language, app-wide text size, a color-vision palette with a live status-color preview, and layout reset.
- Advanced can restore dismissed confirmations and defines how deletion requests on NAS storage are handled.
- Support & Info can schedule the onboarding coach marks for the next launch, open privacy, terms, refund, EULA, and open-source documents, and compose a support email with app and system diagnostics.
- Delete All Cache clears analysis data and caches. Factory Reset additionally clears the database, registered libraries and folders, signs out of Pro, and then quits the app.
When to use it
If analysis state looks stale after a large project restructure, refresh first, then clear cache only if needed.
Operational notes
- Language changes require restart, while text size and color-vision changes are designed to update the interface directly.
- Clearing cache forces analysis data to be rebuilt and can take time for large projects.
- Factory Reset is a stronger action and should be kept as a last step because it removes registered sources and account state in addition to cached analysis.
- If account or license state looks wrong, check network connection, billing state, active-device status, and the account page before logging out.